Recordings
Thanks to recordings, you can access your past calls for up to 90 days.
Setting up
To turn on recordings, go to the LiveCalls dashboard, open Settings, click on the Recording tab, and then click on the Enable recordings switch. You can also turn on the Automatically record all calls to save them all, so your agents won’t have to do it manually during each call.
If you don’t have available funds in your LiveCalls balance, then you won’t be able to create a recording even if it’s turned on automatically.

If you’re not using the auto recording, your agents will see the option to start recording during the call.

Saved recordings
To access your recordings, go to the LiveCalls dashboard and open Recordings. Here, you’ll find all agents’ video call recordings. Easily review conversations, check service quality, and keep up with your team’s interactions.
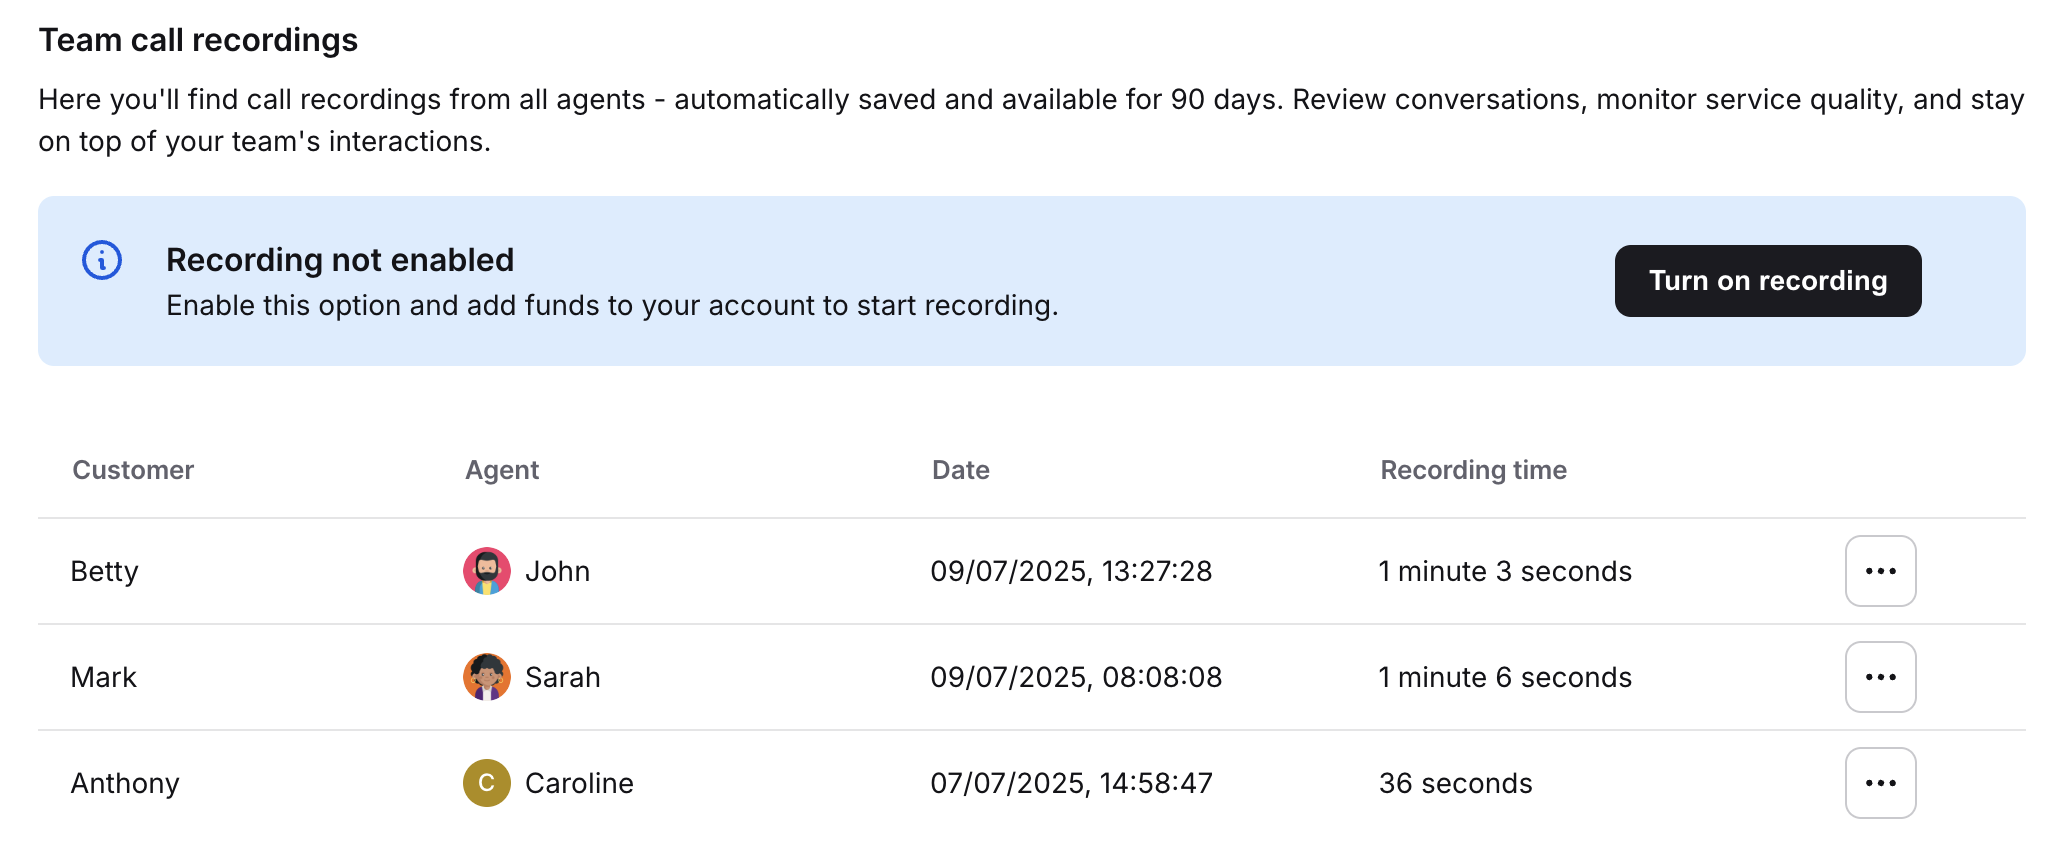
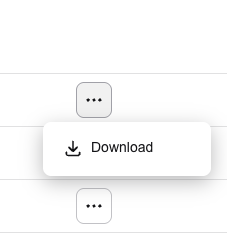
You can download each recording by clicking the three dots at the end of the row and selecting the Download button.