
First Steps
To integrate LiveChat with Apple Messages for Business, set up your Apple Messages account, connect it to LiveChat, and enable customer contact via Messages.
Creating Apple Messages for Business Account
First, go to Apple Business Register and connect your Apple ID with Apple Business. We recommend using an Apple ID that is connected to your business email.
Adding a Business Account for Messages
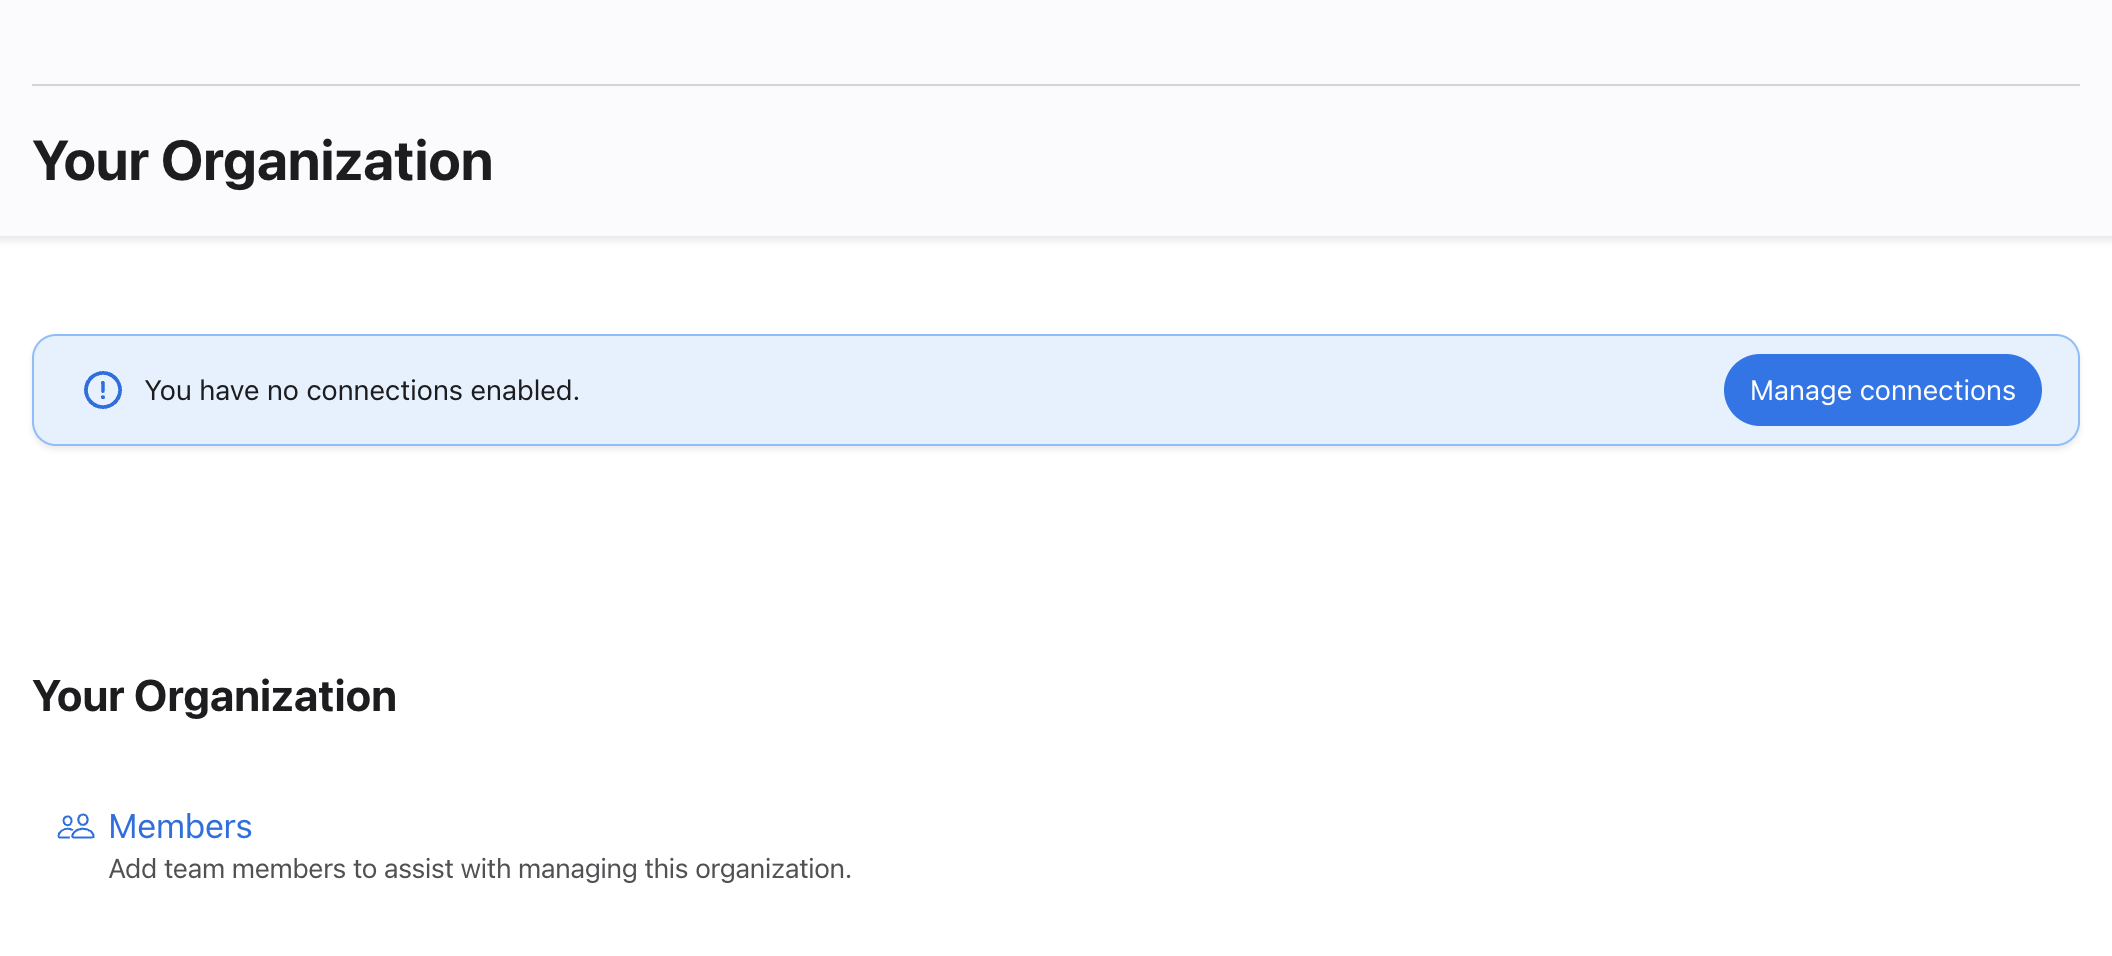
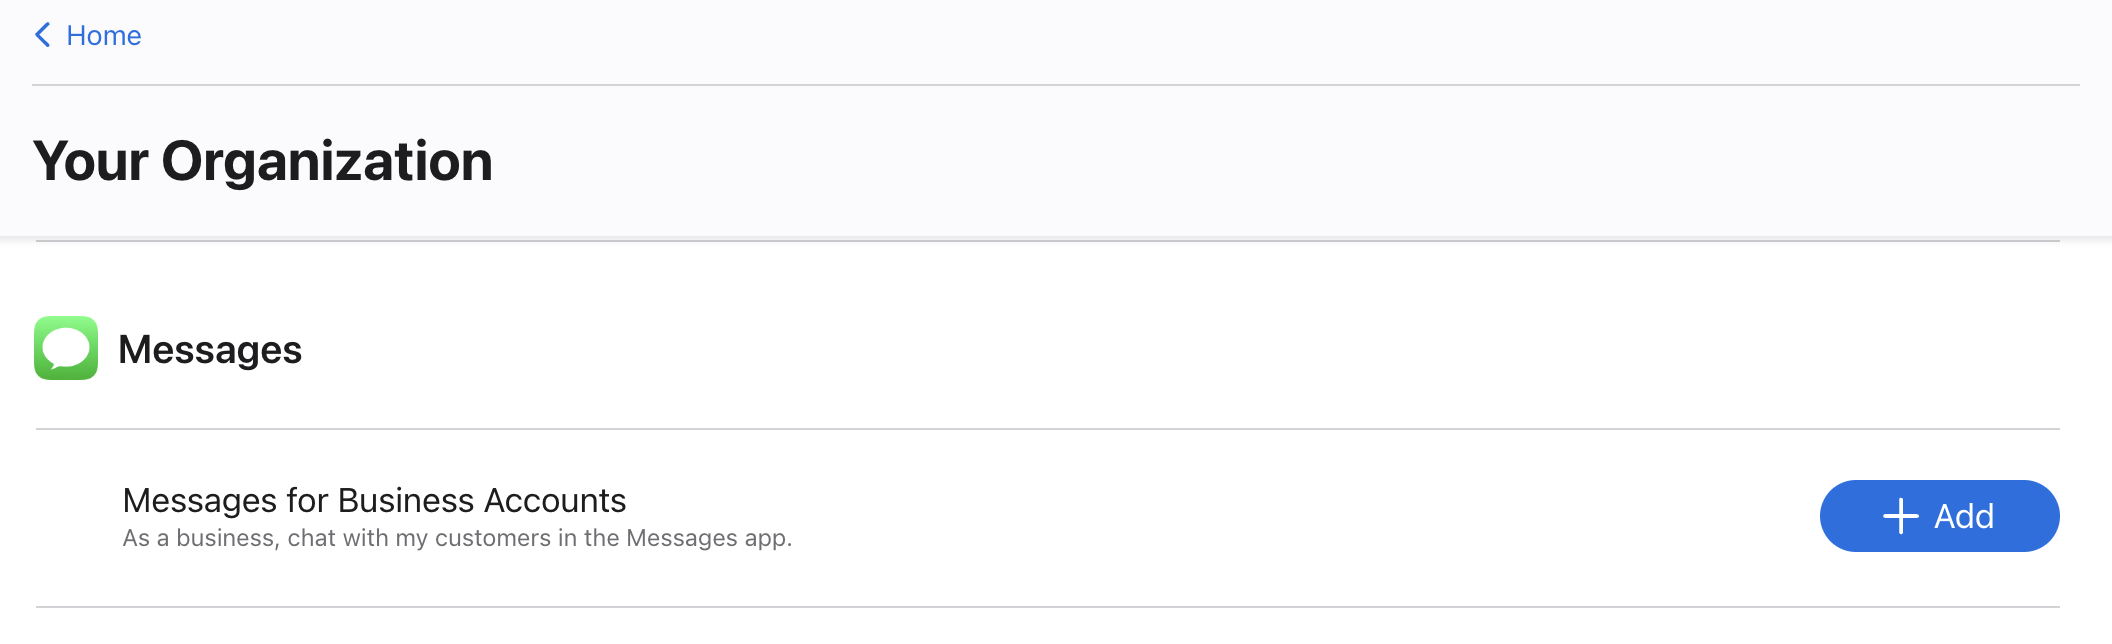
Go to Manage connections. Find Business Accounts for Messages in the Messages section and click + Add service. Click Done at the bottom of the page.
Configuring your Messages for Business Account
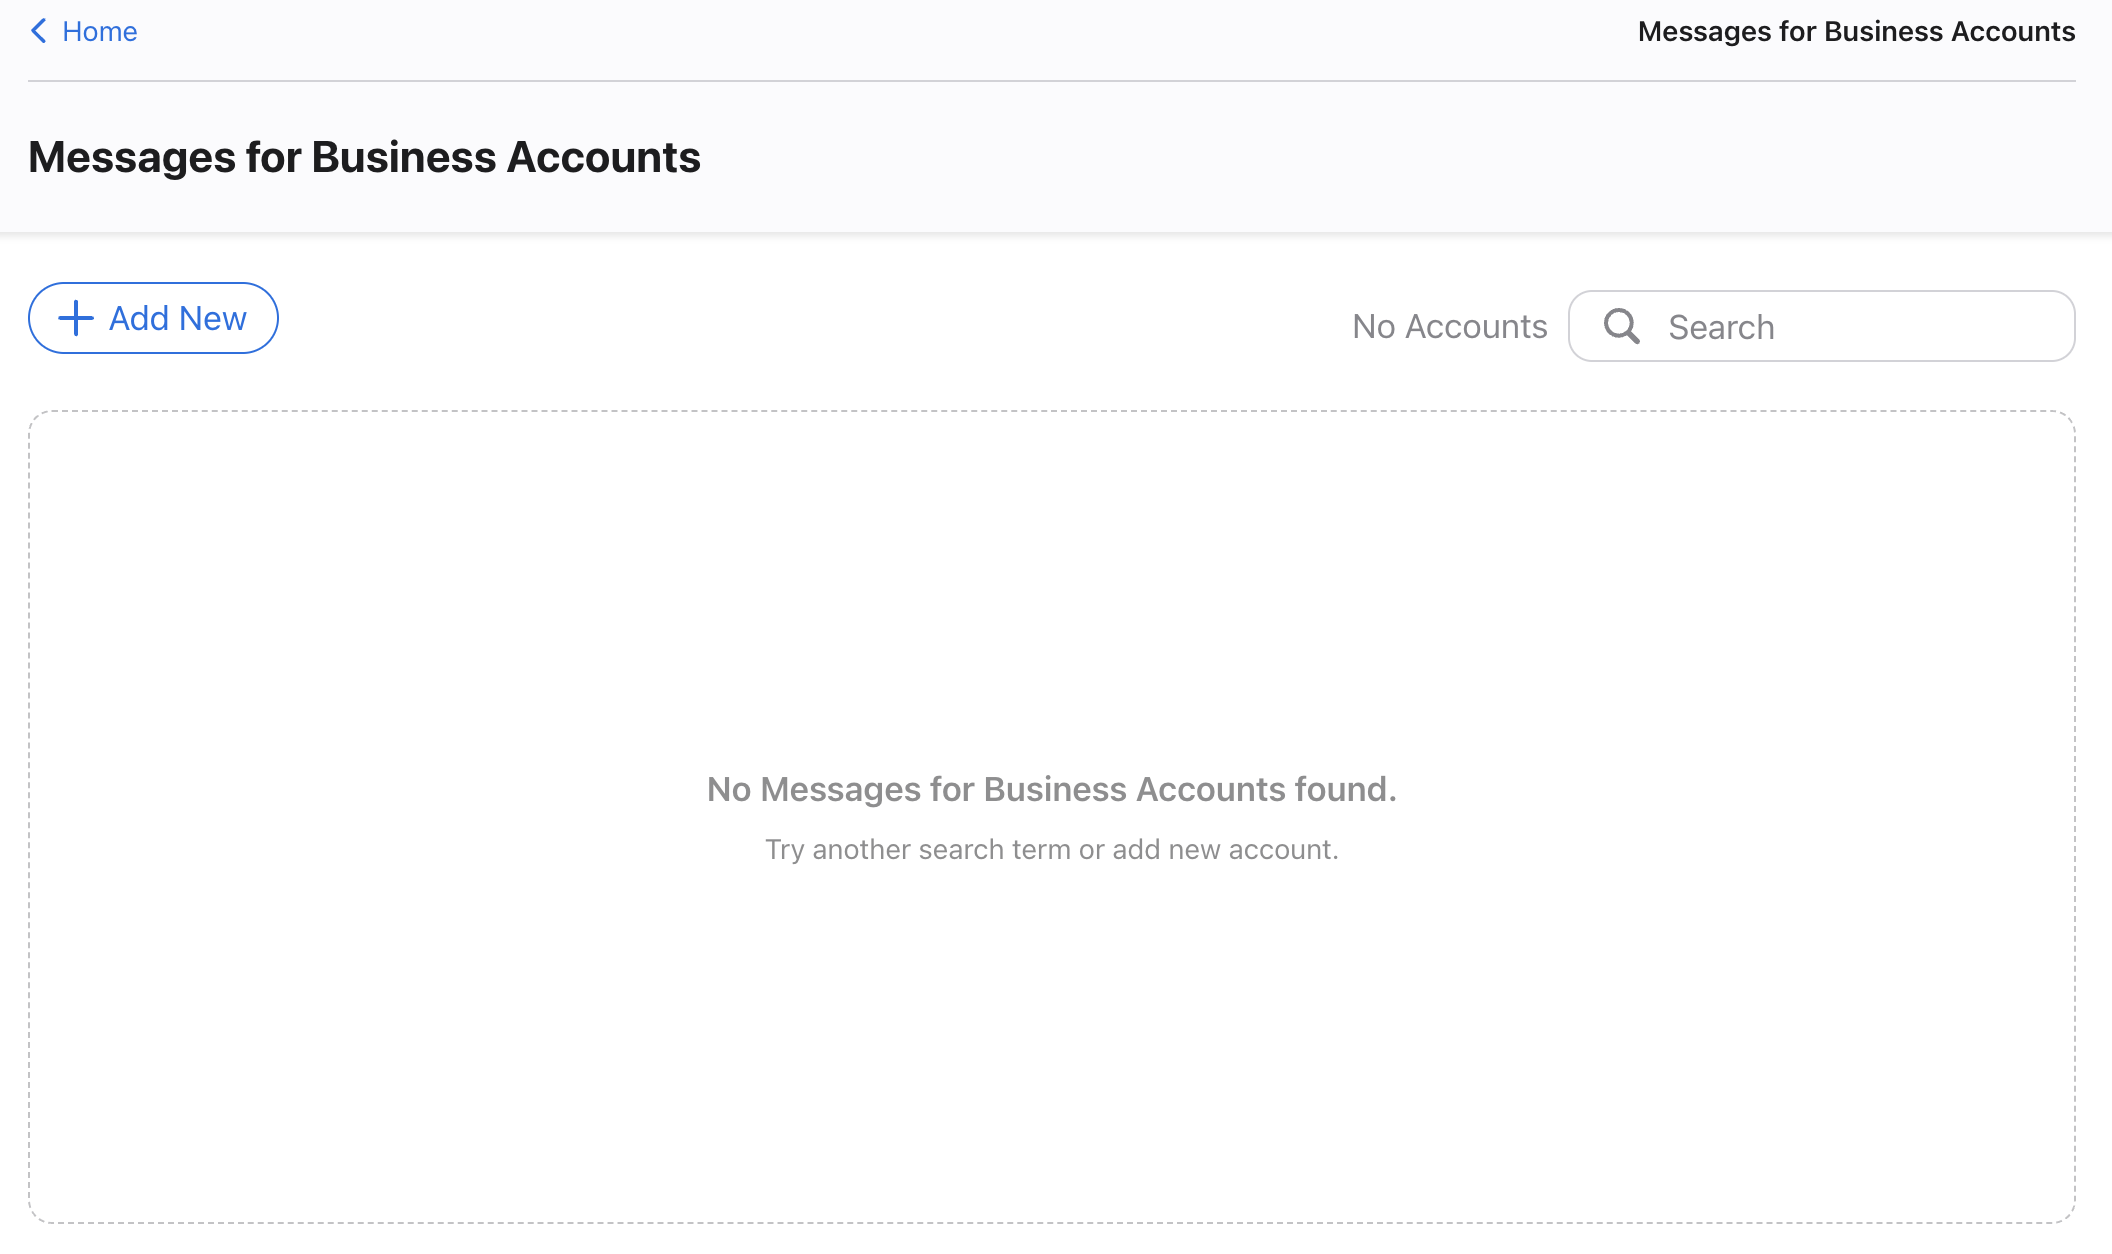
In Your connections, select Messages for Business Accounts. In the new window, click on + Add new in the top left corner.

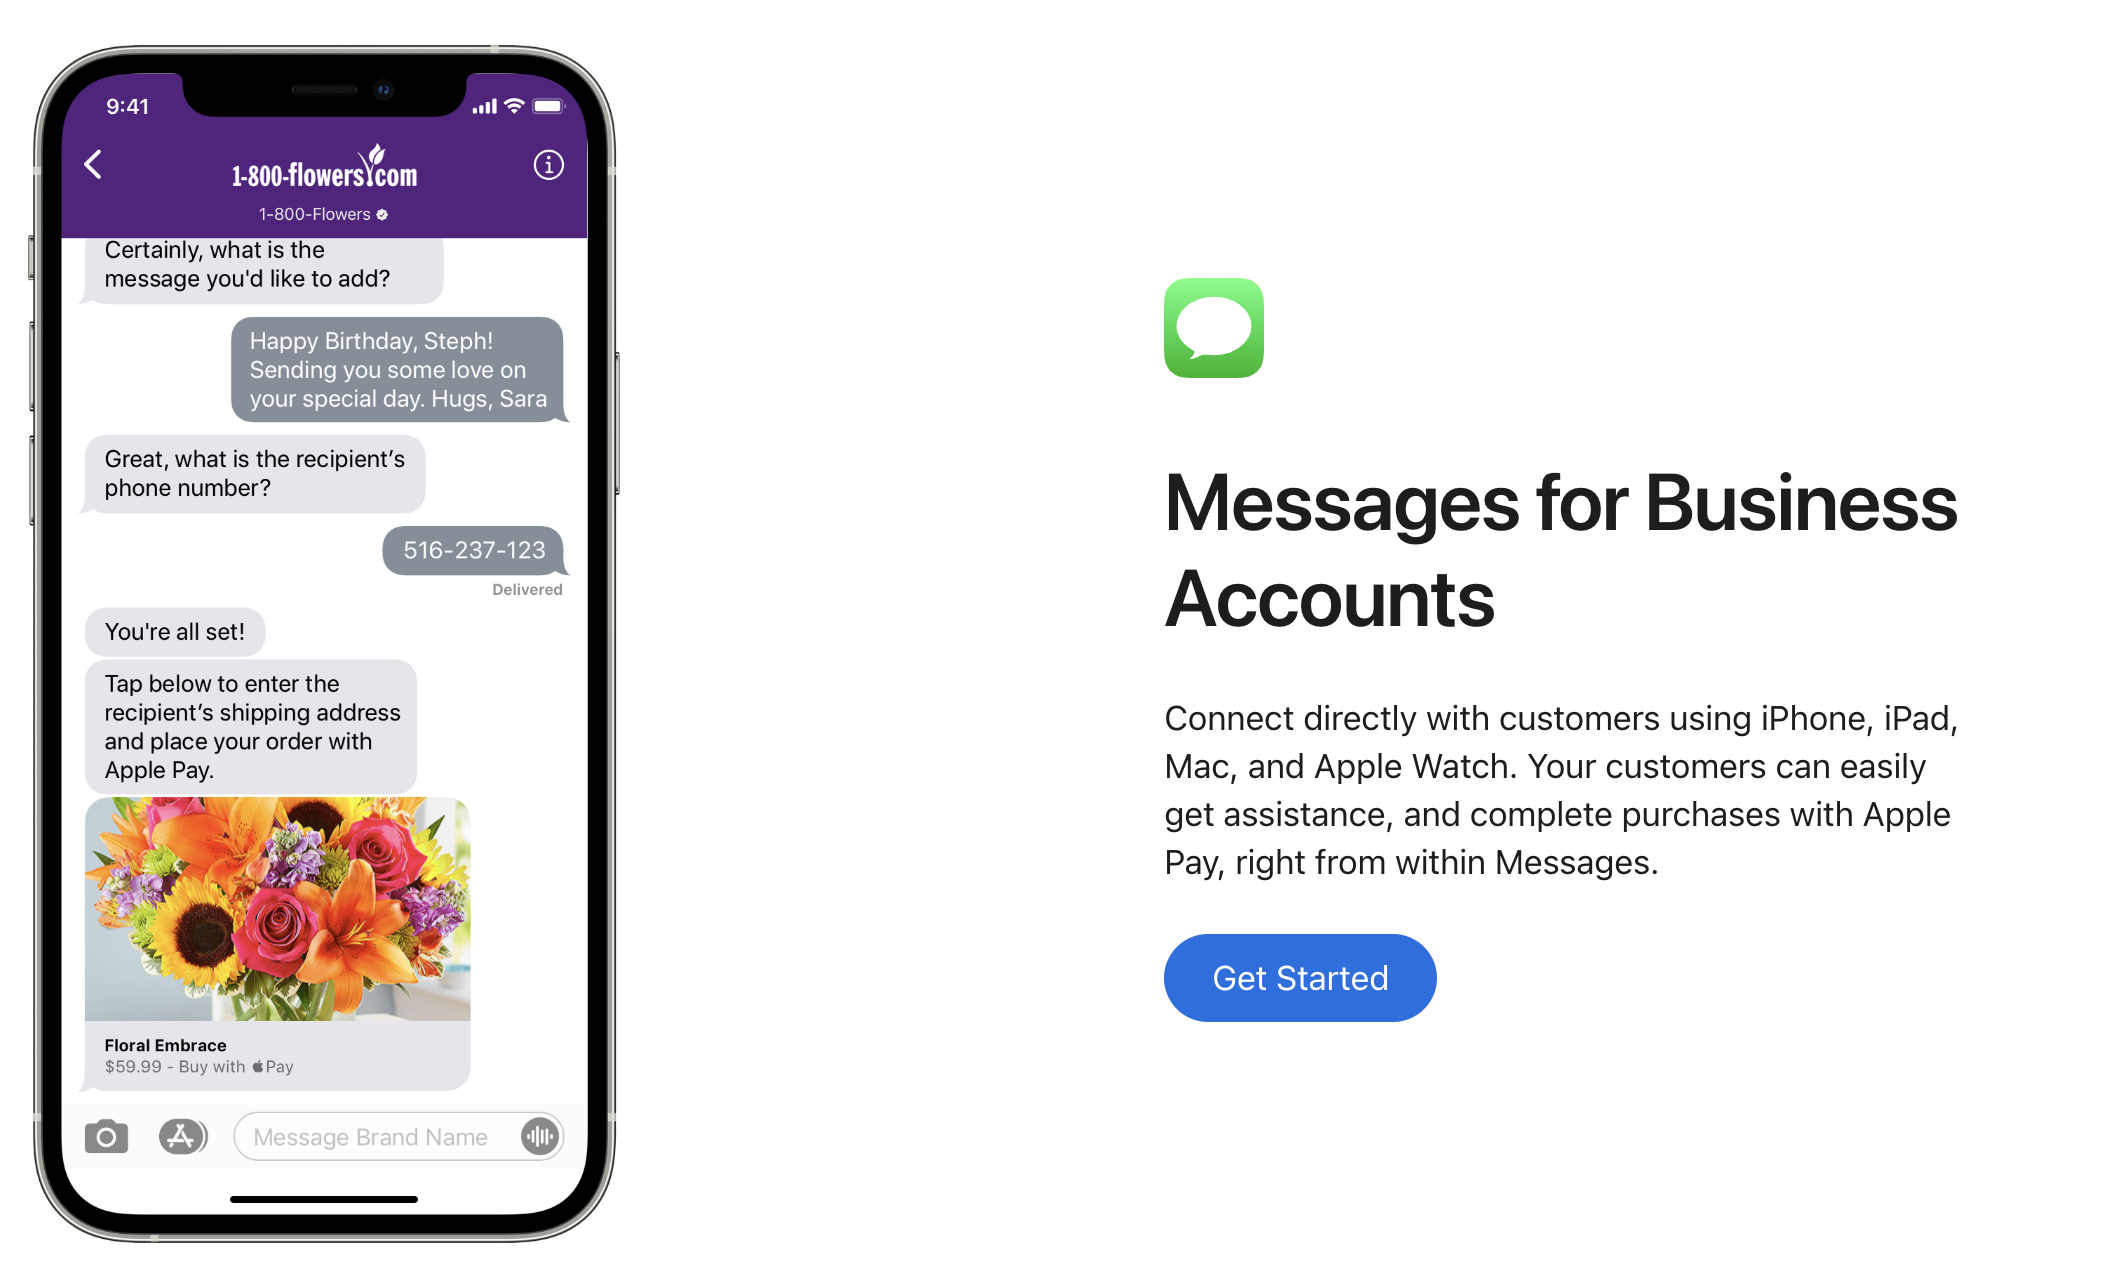
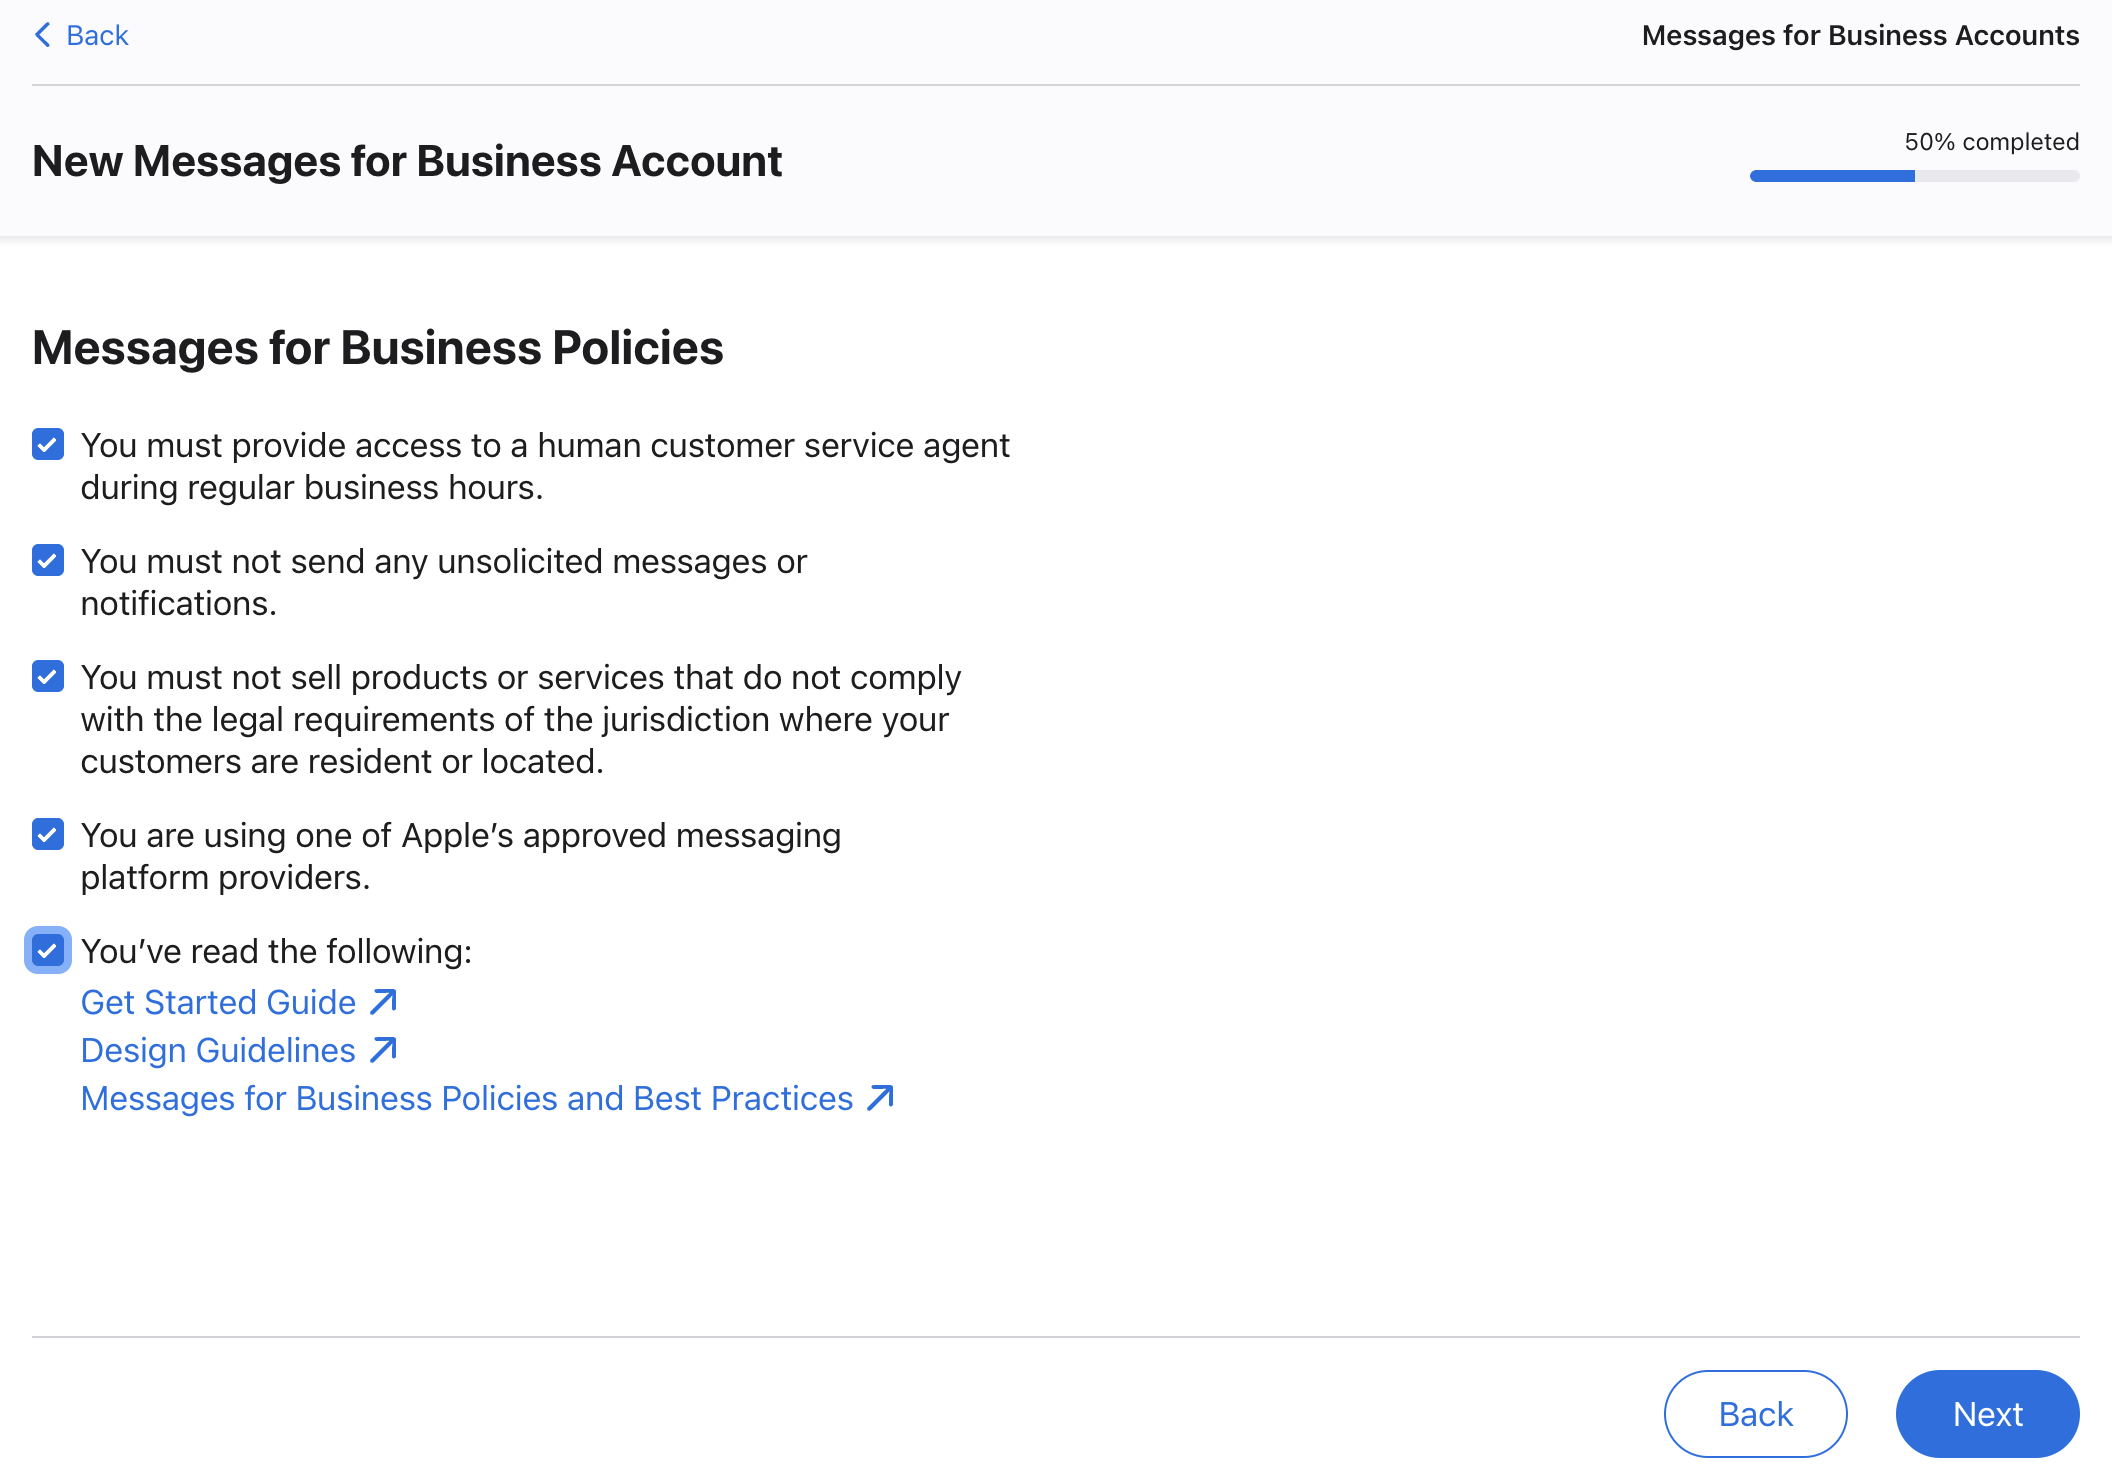
Then, click on Get Started. Read and agree to Apple Messages for Business policies. Check all boxes and click Next to proceed.
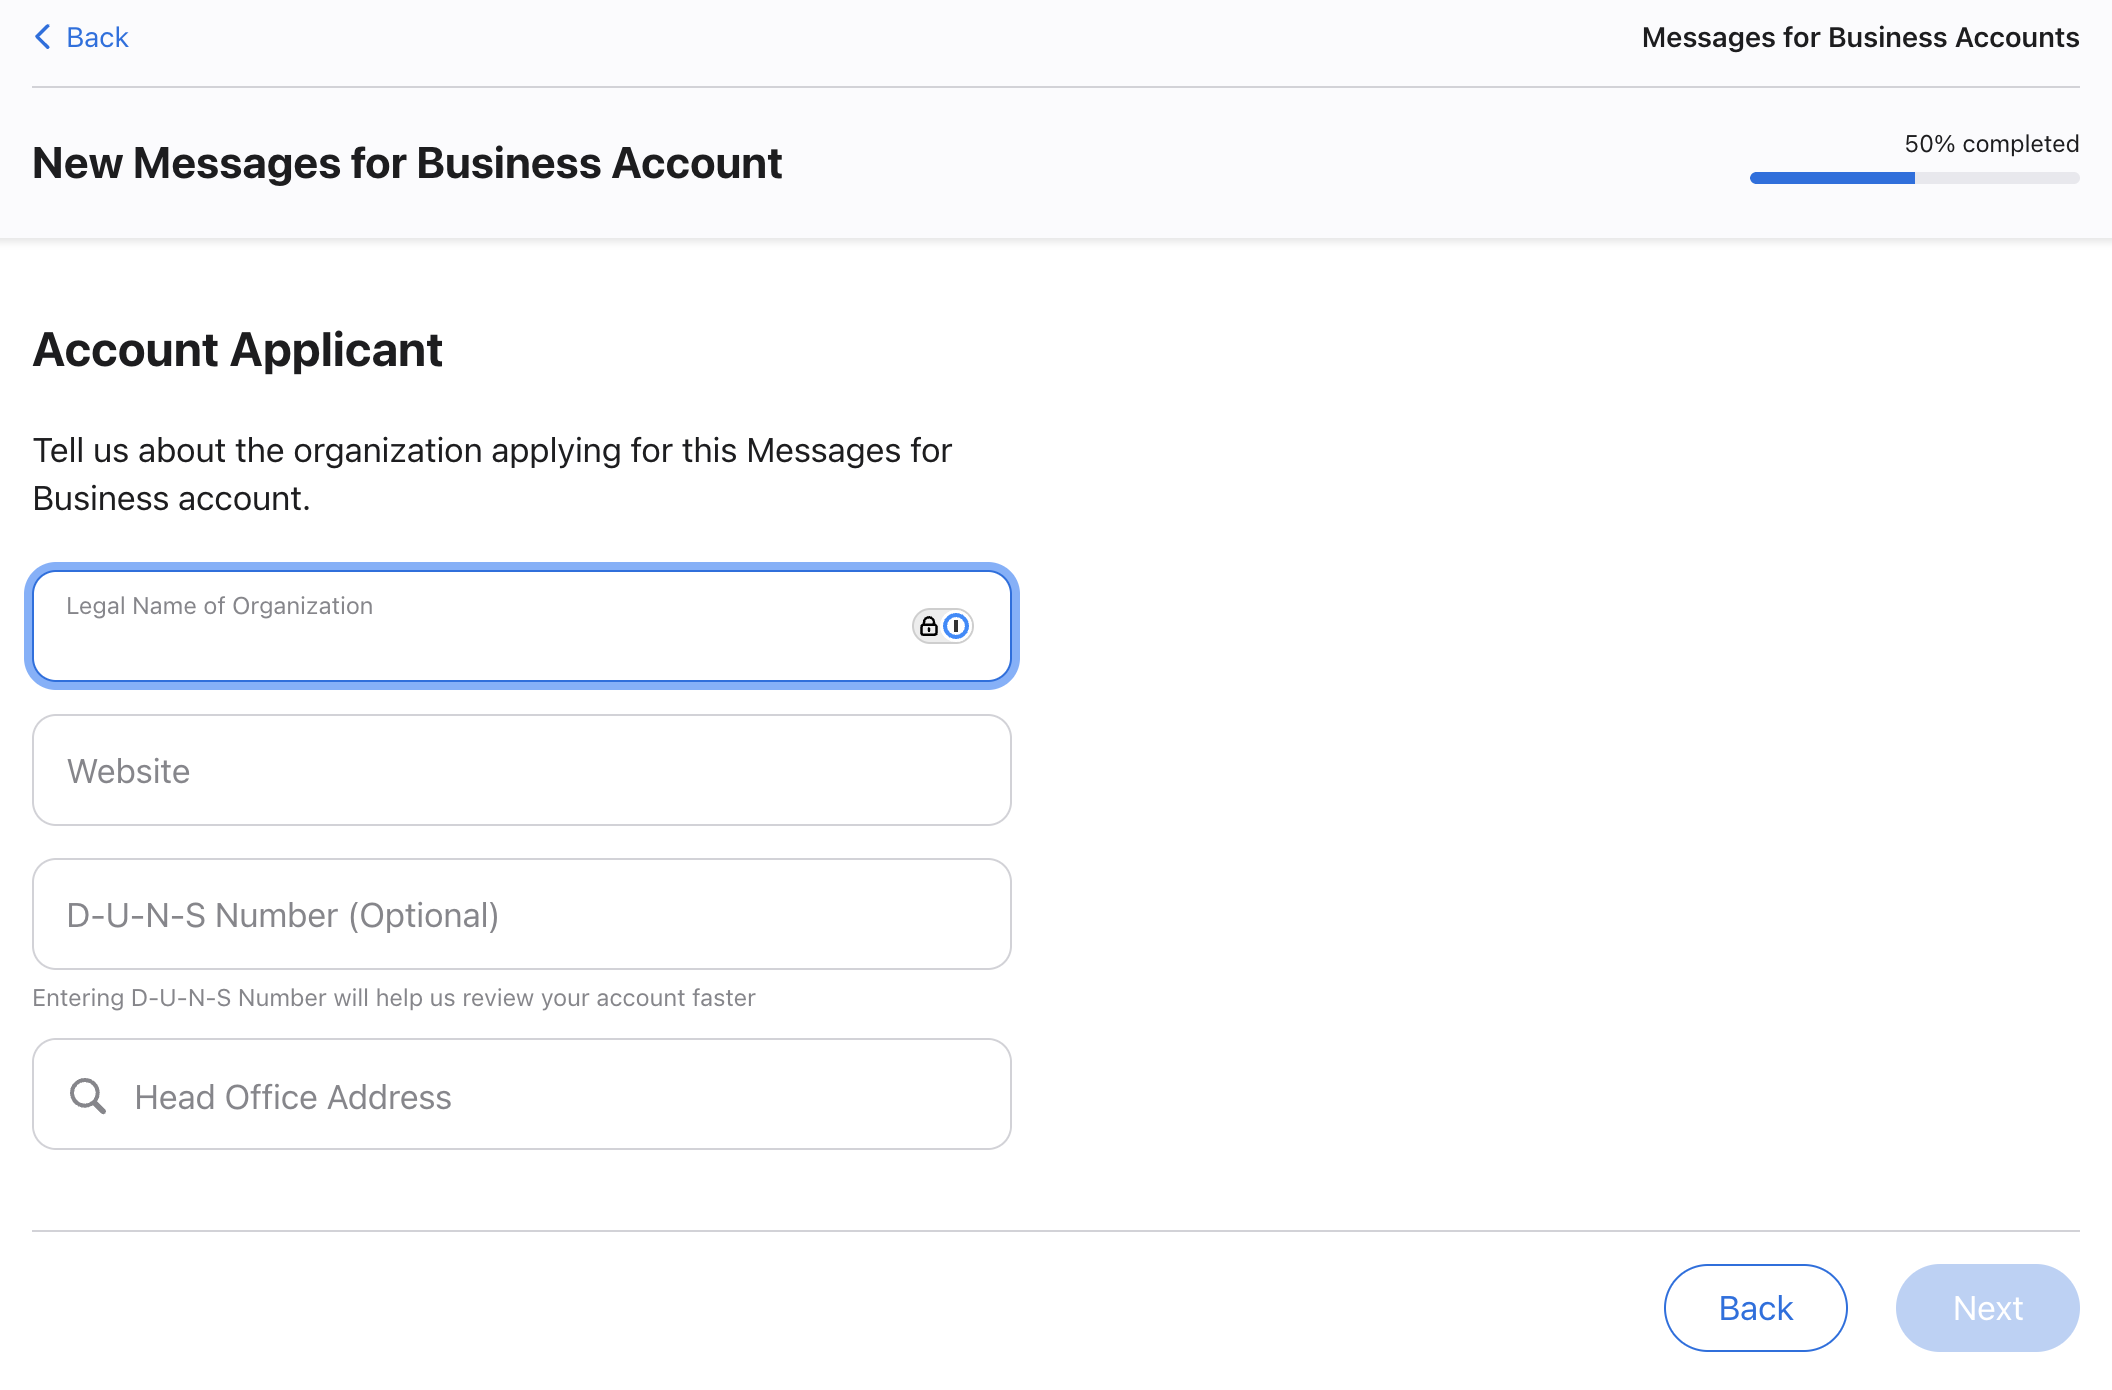
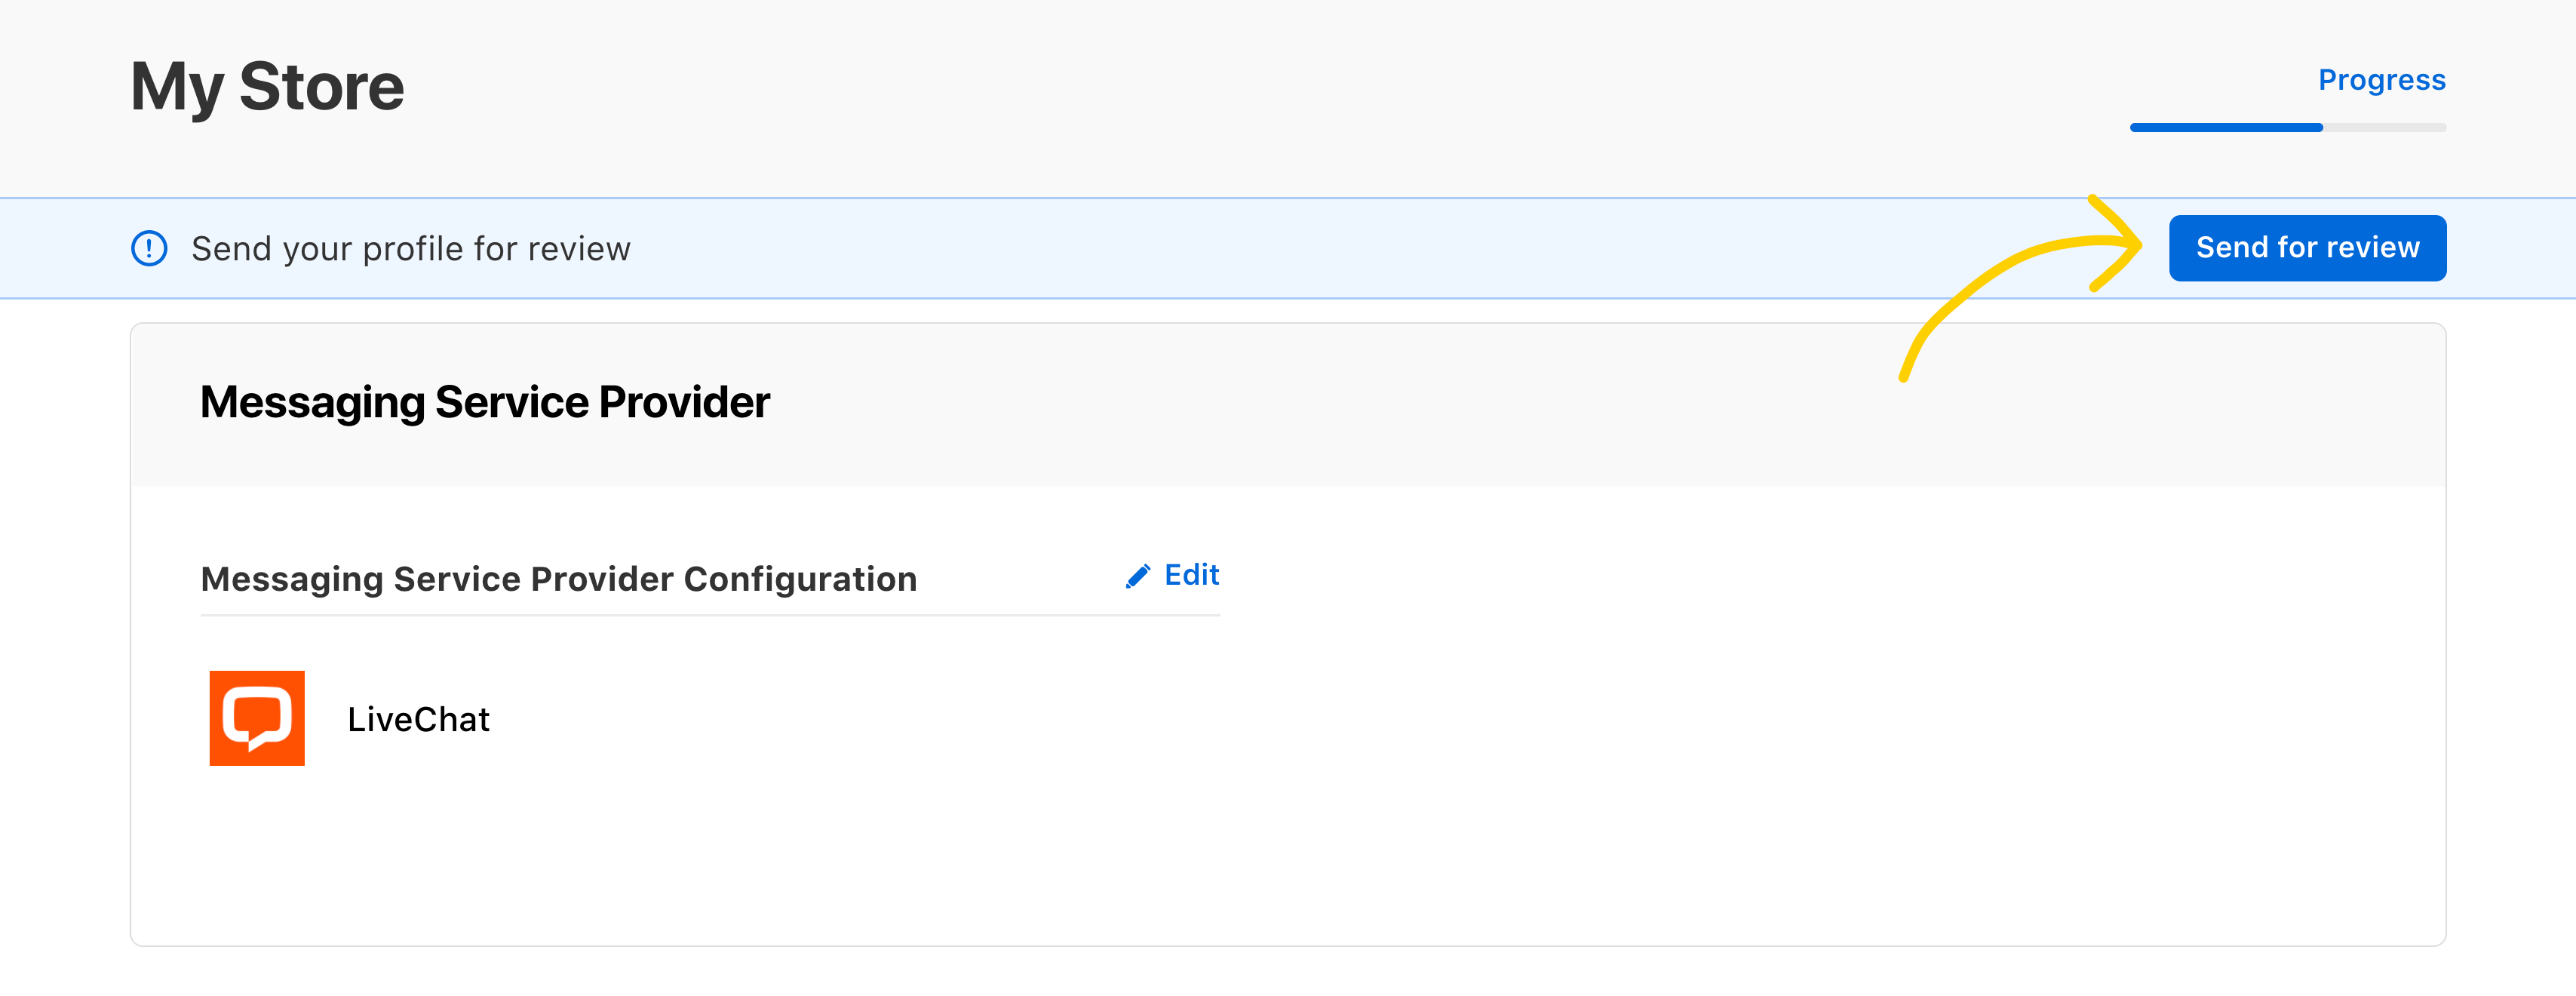
Now, you need to fill out your application. Apple will review it before you can start using Messages for Business.
The application has four parts:
1. providing basic business info and contact details
2. entering details for the Brand Information Card (e.g., website, agent hours)
3. uploading your brand logo for the Messages app
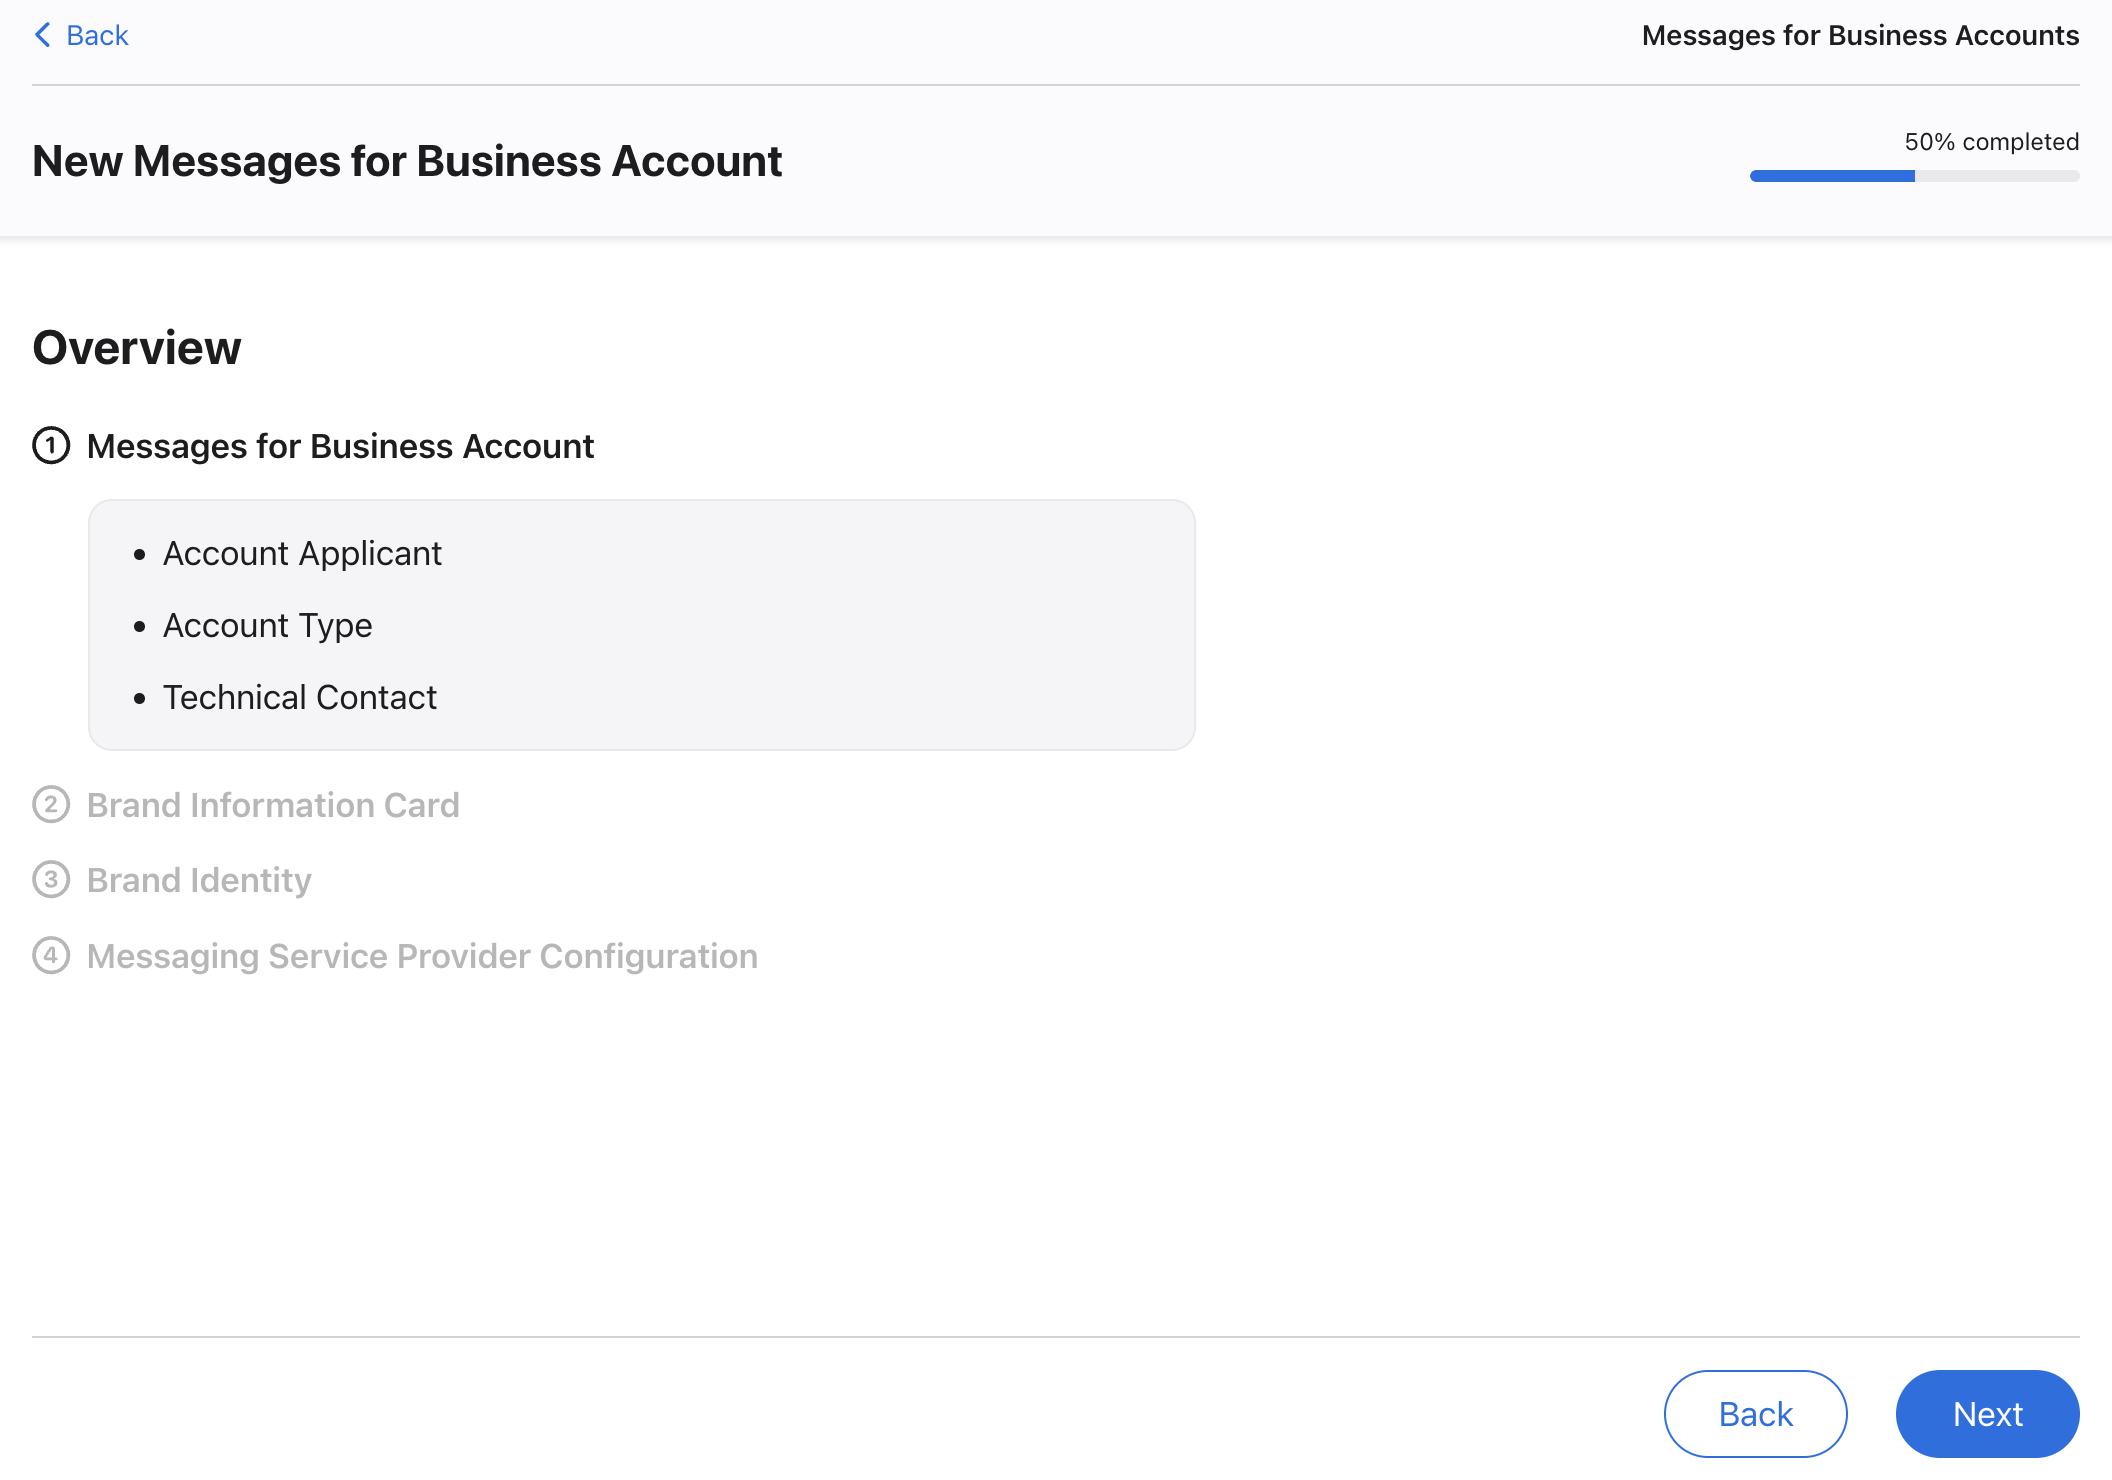
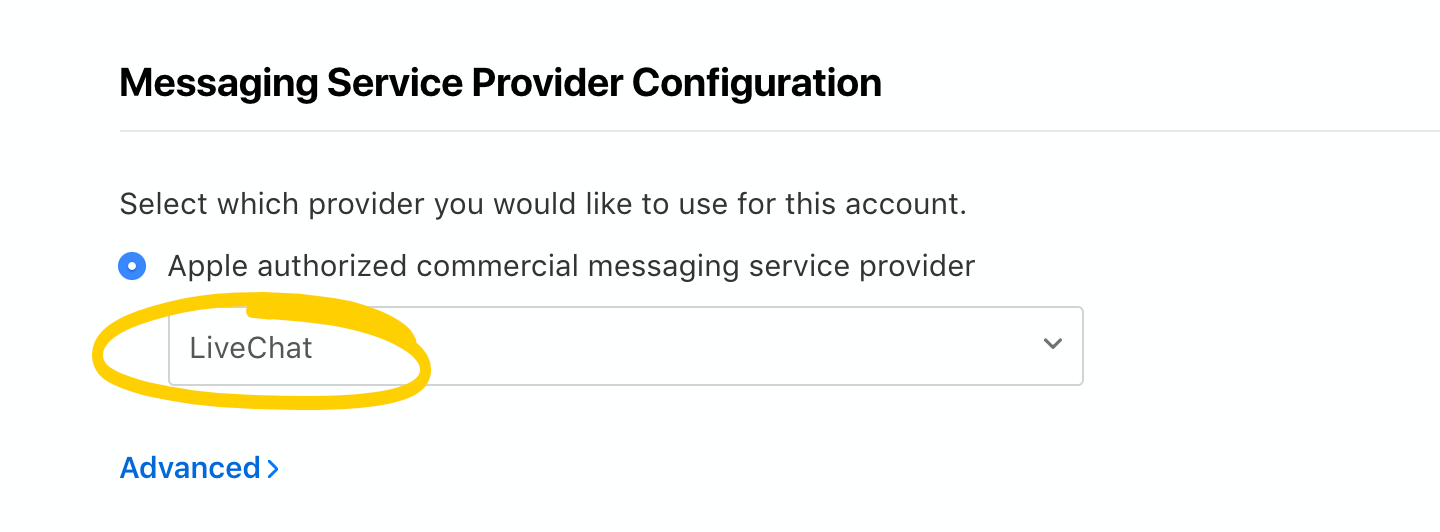
4. choosing LiveChat as your messaging service provider from the dropdown list
After completing the application, check if all the provided information is correct and click Send for review.
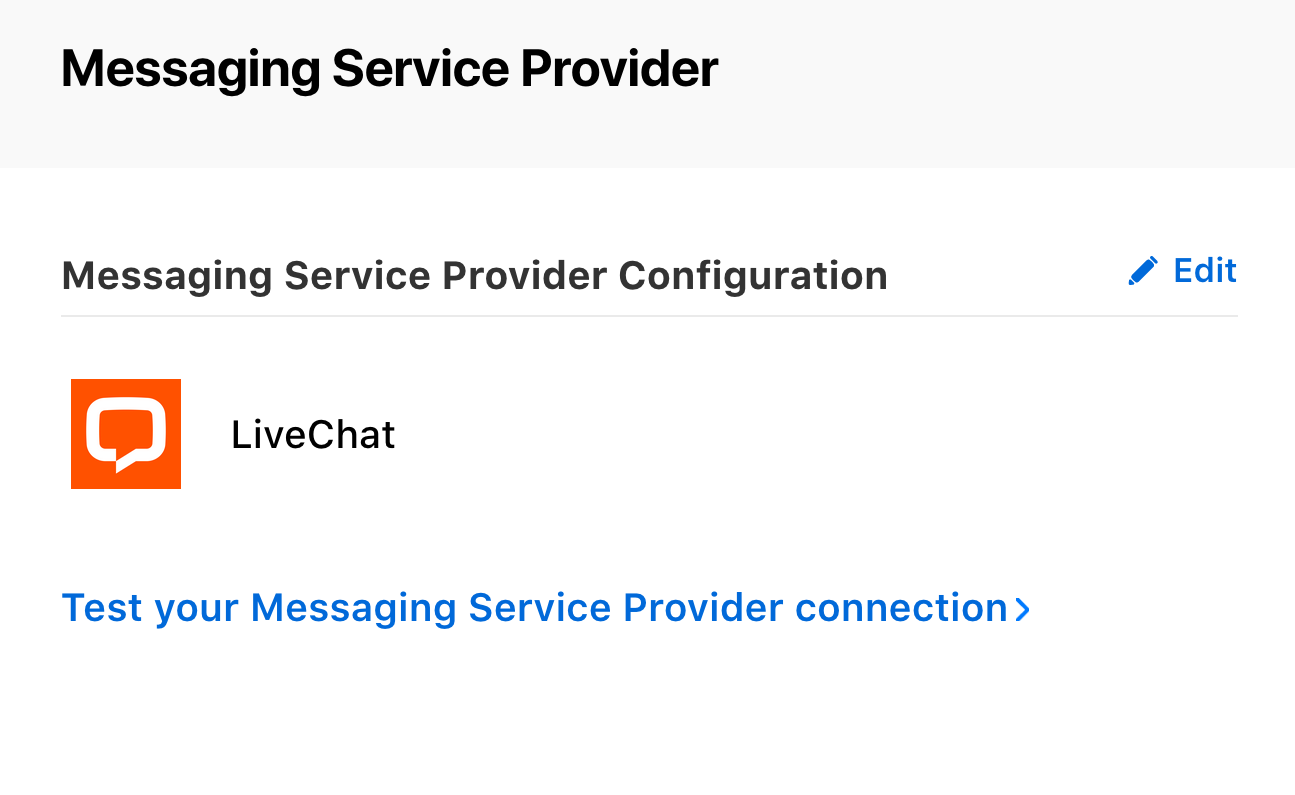
Connecting your Apple Business Account to LiveChat
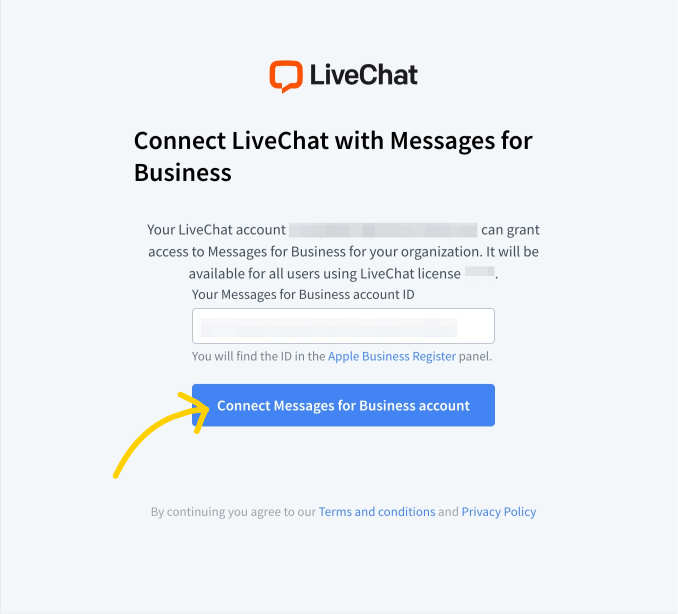
Once your application has been approved, connect your Apple Messages account to LiveChat and test the connection by clicking the provided link. Then click on the Connect button.
If unavailable, wait until your Messages for Business account is approved.
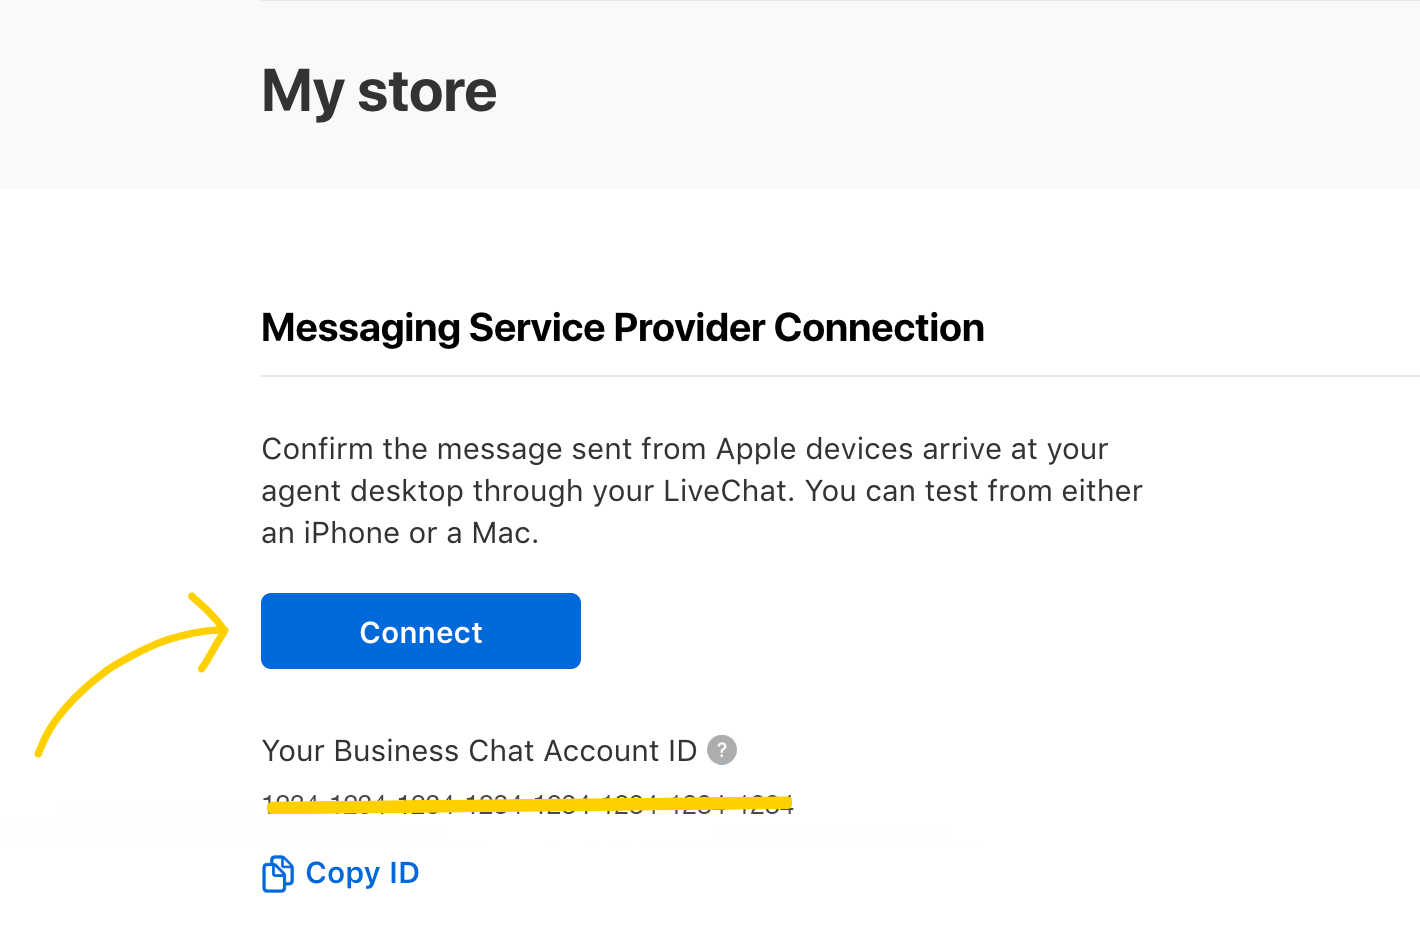
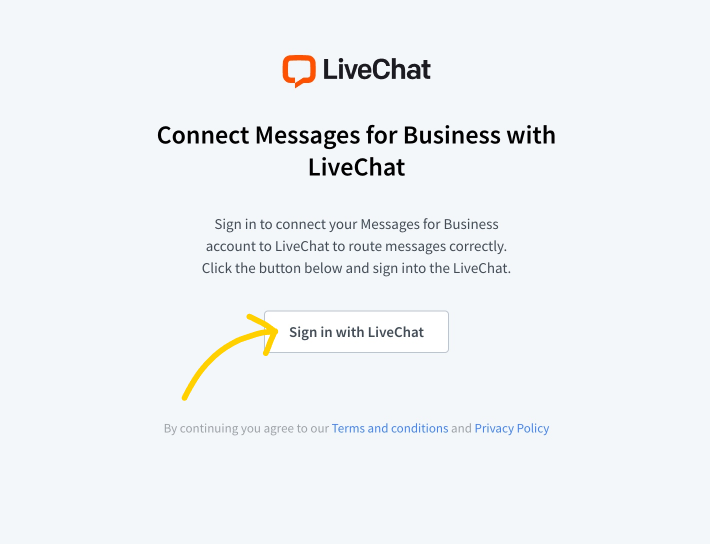
Sign in using your LiveChat credentials and follow the instructions. After signing in with LiveChat, you'll see the license to connect with Apple Messages. Click Connect Messages for Business Account to proceed, which will end the integration process.
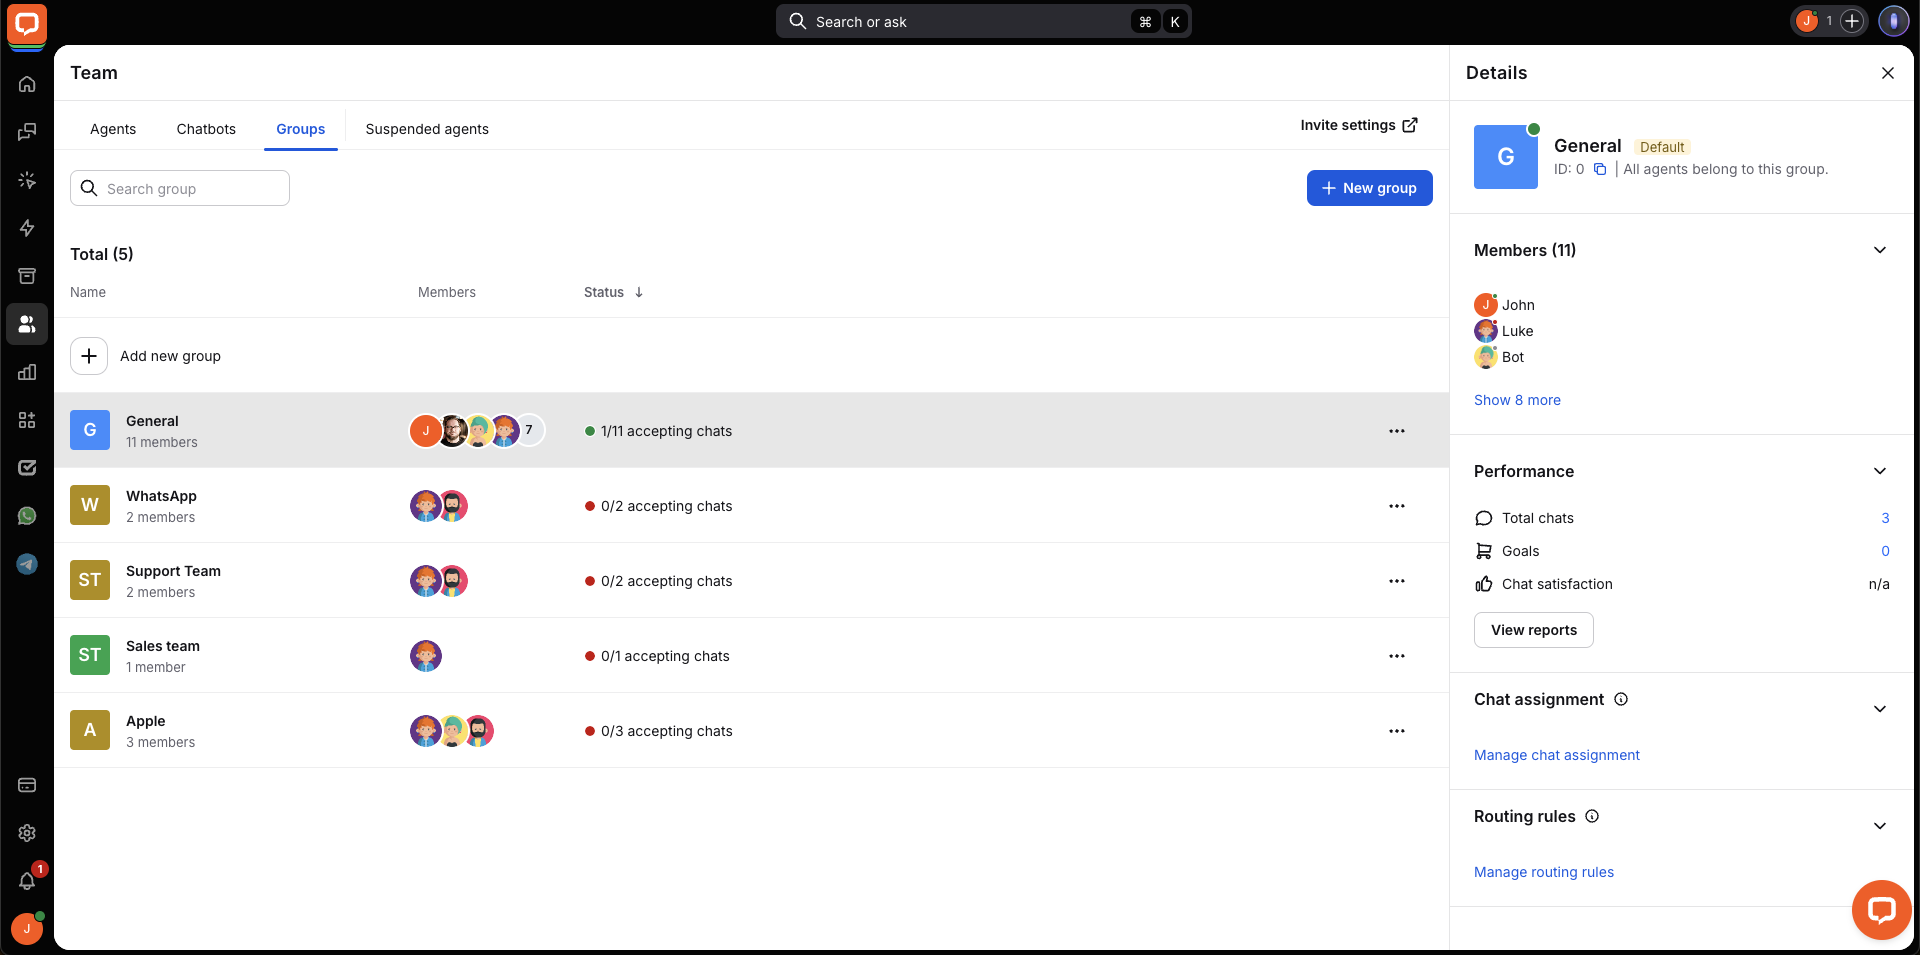
Adding your Apple Messages to a group
Remember to assign the relevant groups to each number for efficient communication. This allows you to assign agents (including bots) to your Apple Messages, ensuring only the selected group receives messages from that channel.
Creating a new group
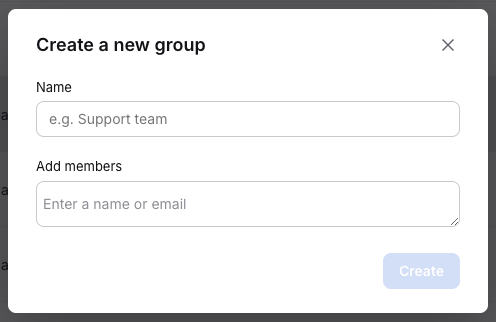
You may need to create a new group. To do this, go to the Groups section under the Team tab and click on the + New group button.
Name it and add agents.
Click Done to finish.
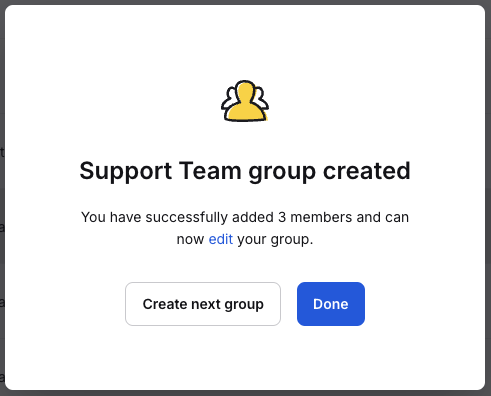
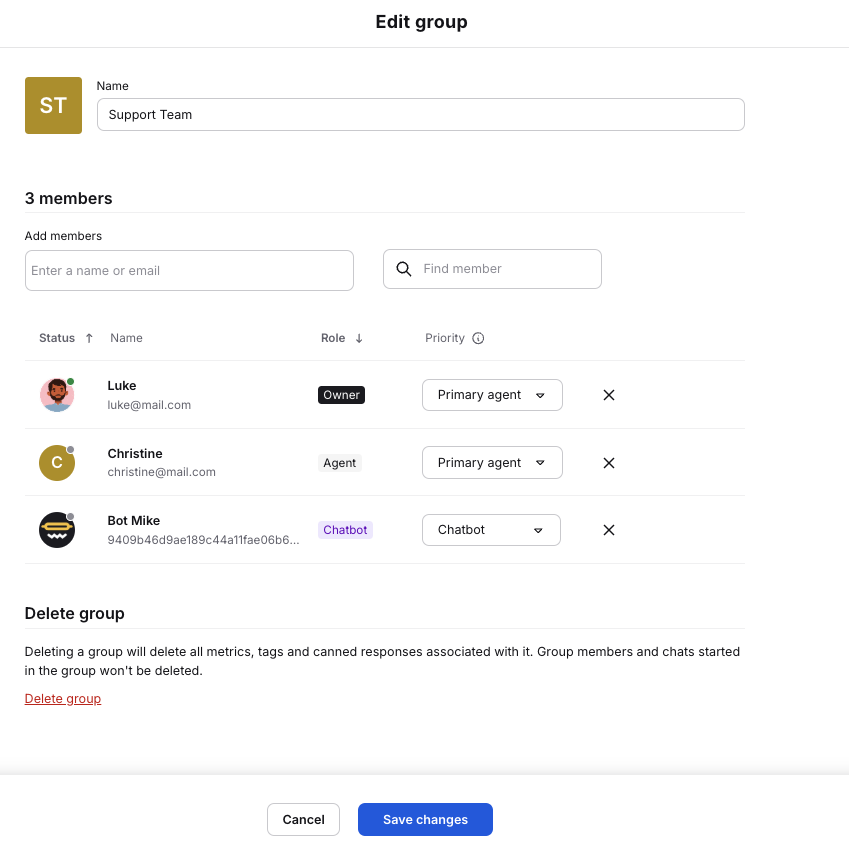
You can edit your groups at any time by clicking the three dots menu next to one of them.

You can change the group name, add or remove members, adjust member priorities, and delete the group. After making changes, two buttons will appear at the bottom of the screen. Click Save changes to finish.
Connecting the Apple Messages to a group
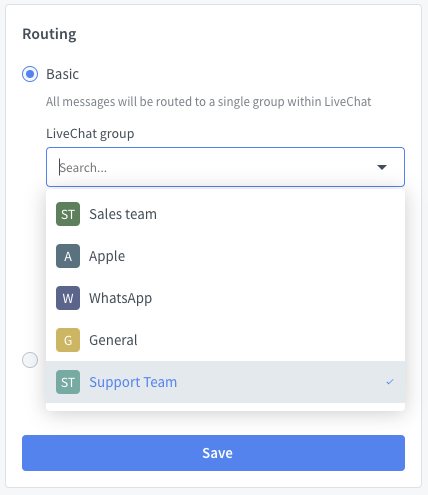
Go to any chat made through Apple Messages in LiveChat, click on the Apple icon in the right sidebar, click the Settings icon, and scroll to the Routing section. Here, you can choose the group that will receive all the messages from this channel. Click Save to finish.
Testing your Apple Messages for Business
Adding testers to your business
The next step is to add your testers, allowing them to send iMessages to your newly created Apple Business Account.
Go to the Messaging Service Provider section and click Edit next to Testers Apple IDs.
Select +Add Apple IDs, add the desired Apple IDs, and click Submit.
After submitting, users will receive instructions via email on how to test the Apple Channel.
Apple testing account may take up to 48 hours to be added. For more details, refer to the Apple Testing Account guide.
Testing message delivery
Now that you've added tester accounts to your business, it's time to see if your messages are going through.
Log in to your Apple Business Account.
Go to the Messages for Business Account section.
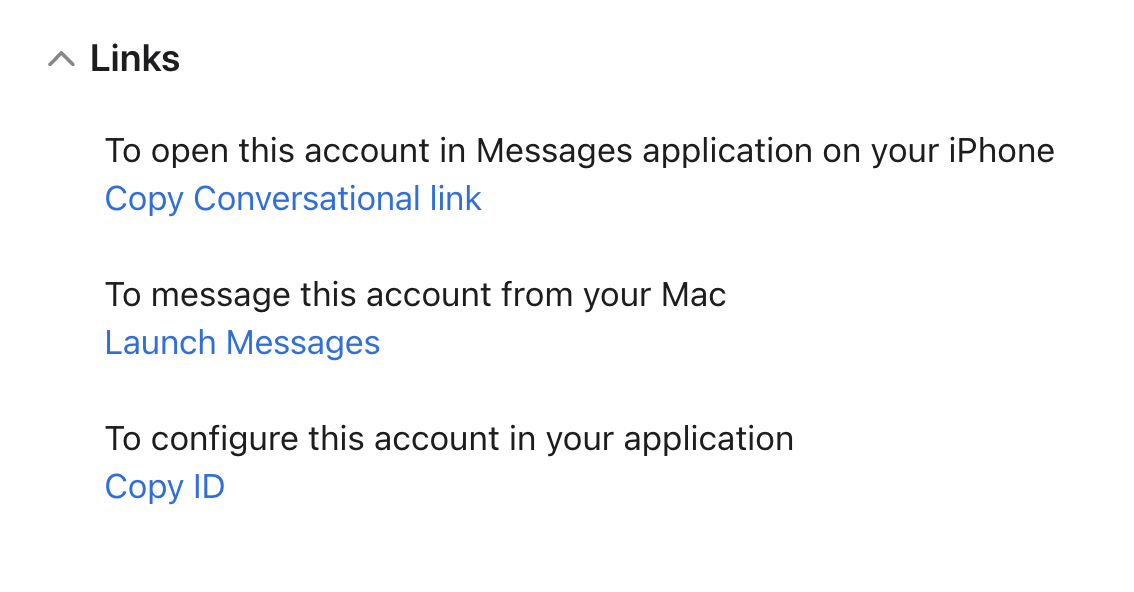
Go to Links.
There, you'll find special links you can use to send a test message through Apple Messages.
Now that you have completed your Apple Business Account integration with LiveChat and tested this channel, the next step is to complete the Apple Experience Review.