Softphone Configuration
To get your number working, you need to create a SIP Trunk in your provider’s system.
Twilio Softphone Configuration
Log in to your Twilio account or create a new Twilio account.
Use one of your existing numbers or buy a new one with voice capability in the Active numbers tab.
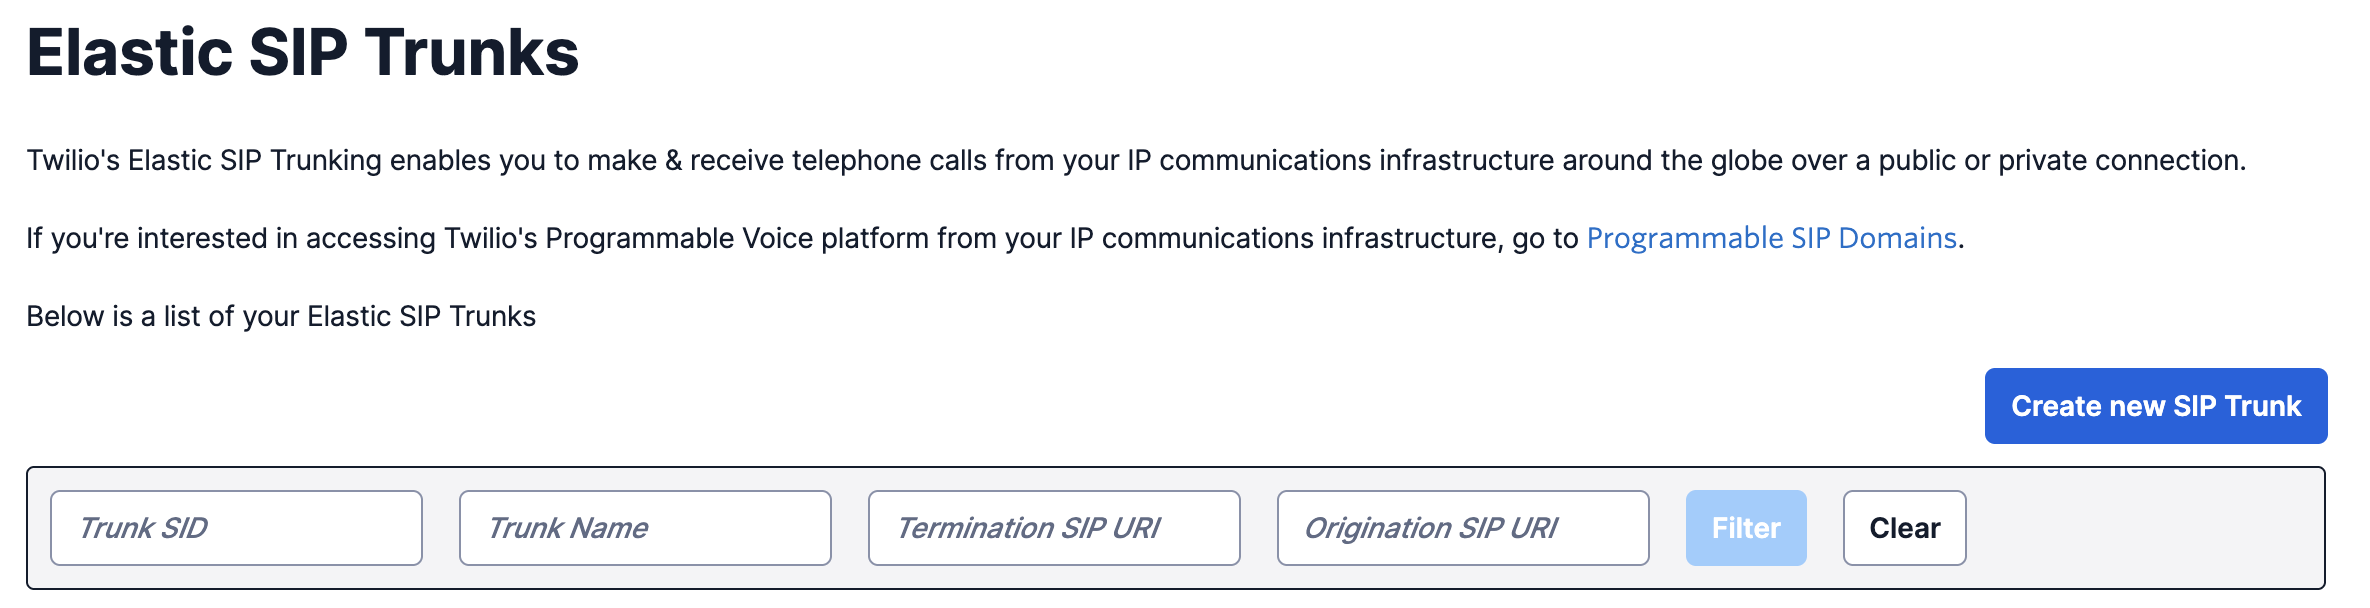
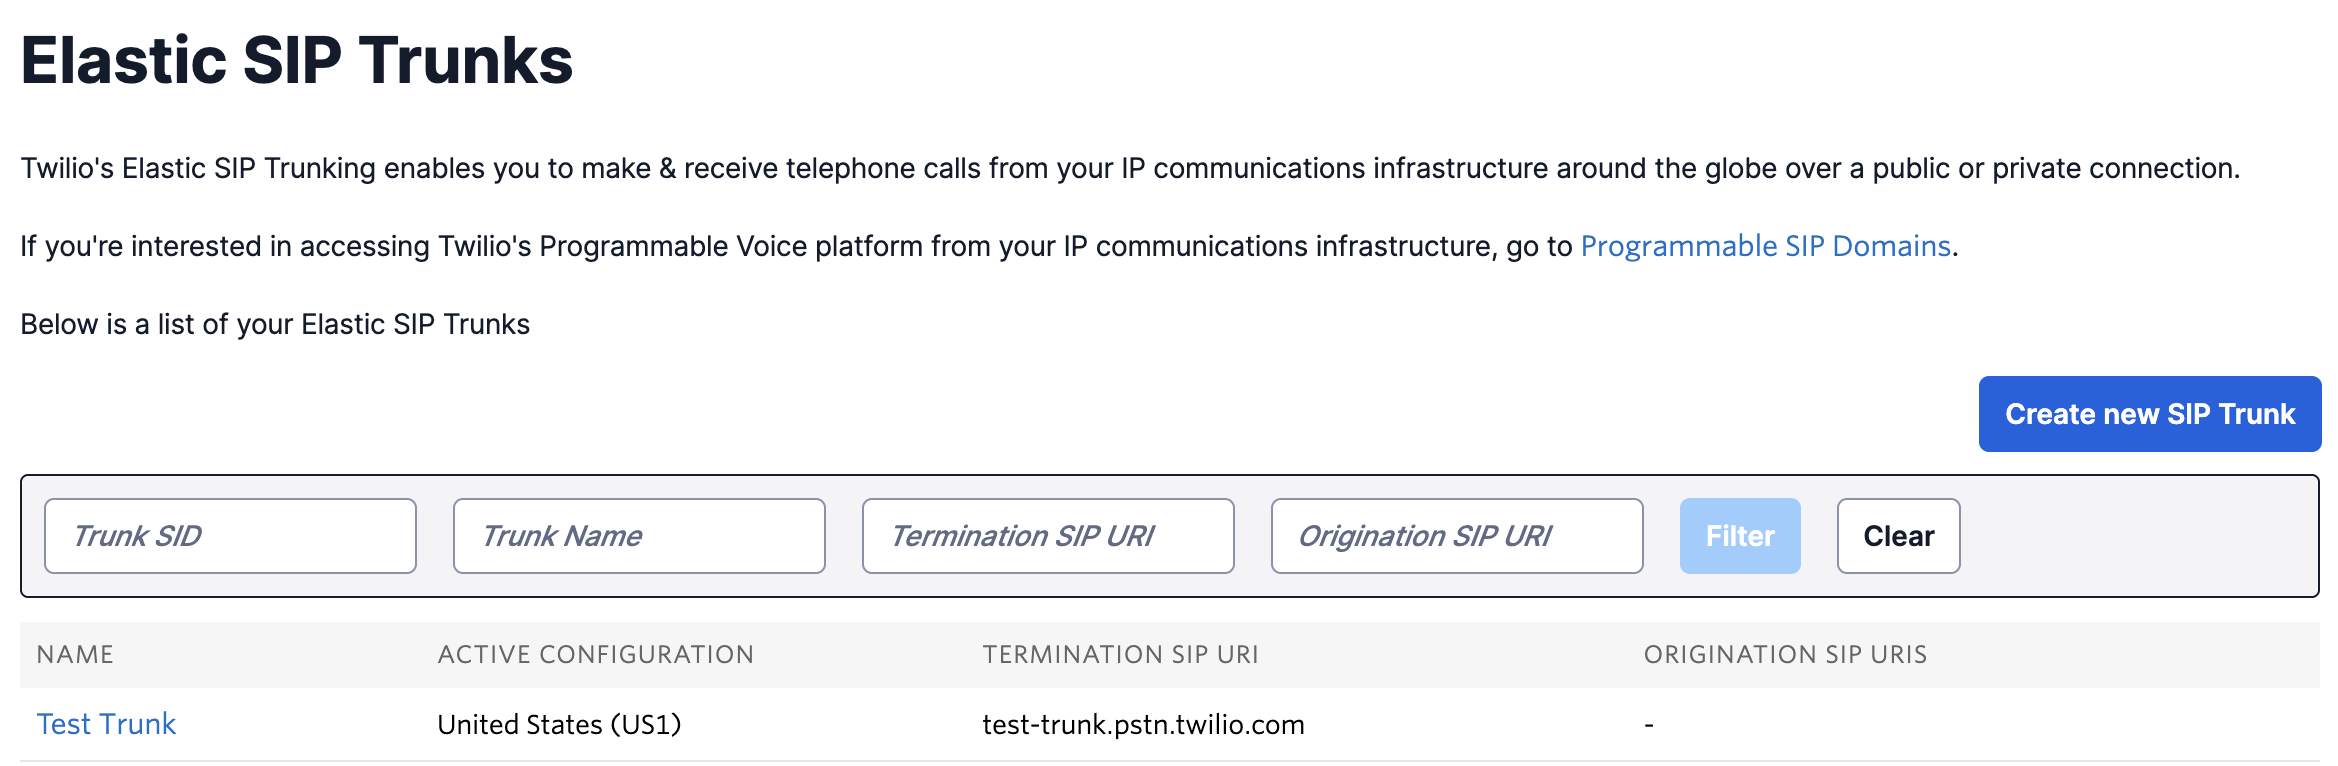
Create a new Trunk in the Elastic SIP Trunks tab. Give it a name and save it. You will be redirected to a settings page.
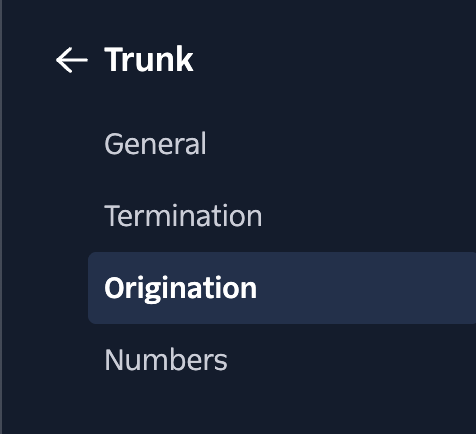
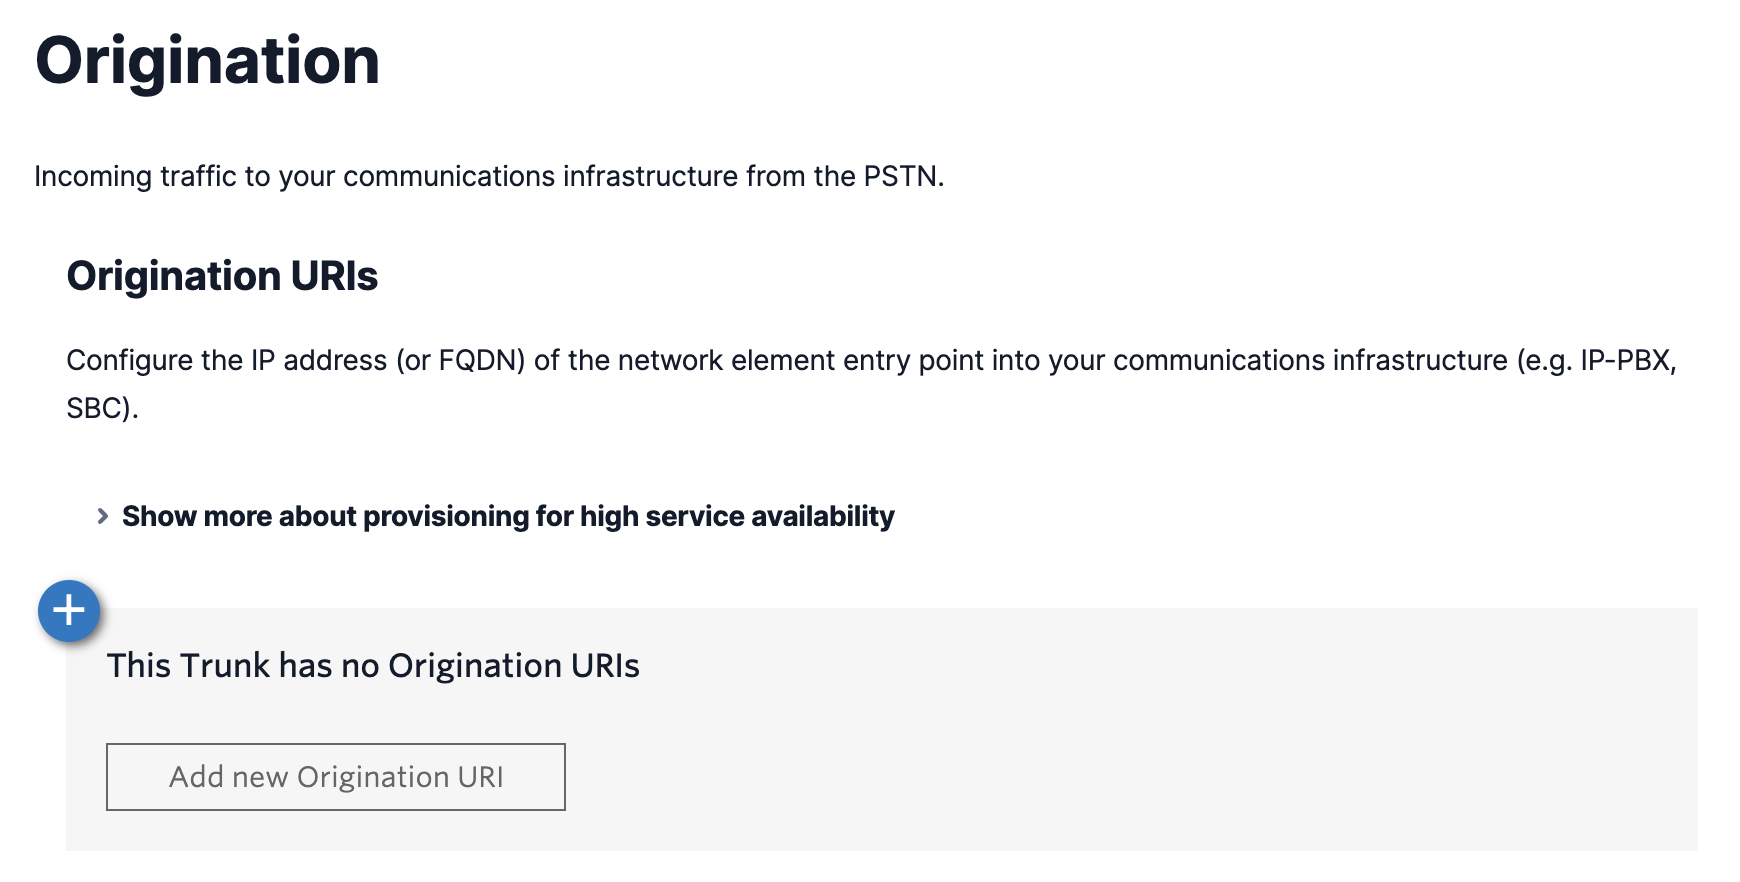
Click on the Origination tab from the left menu. Then click on the Add new Origination URI and add
sip:1h2d2o0jnwo.sip.livekit.cloudas the URI. Save it.
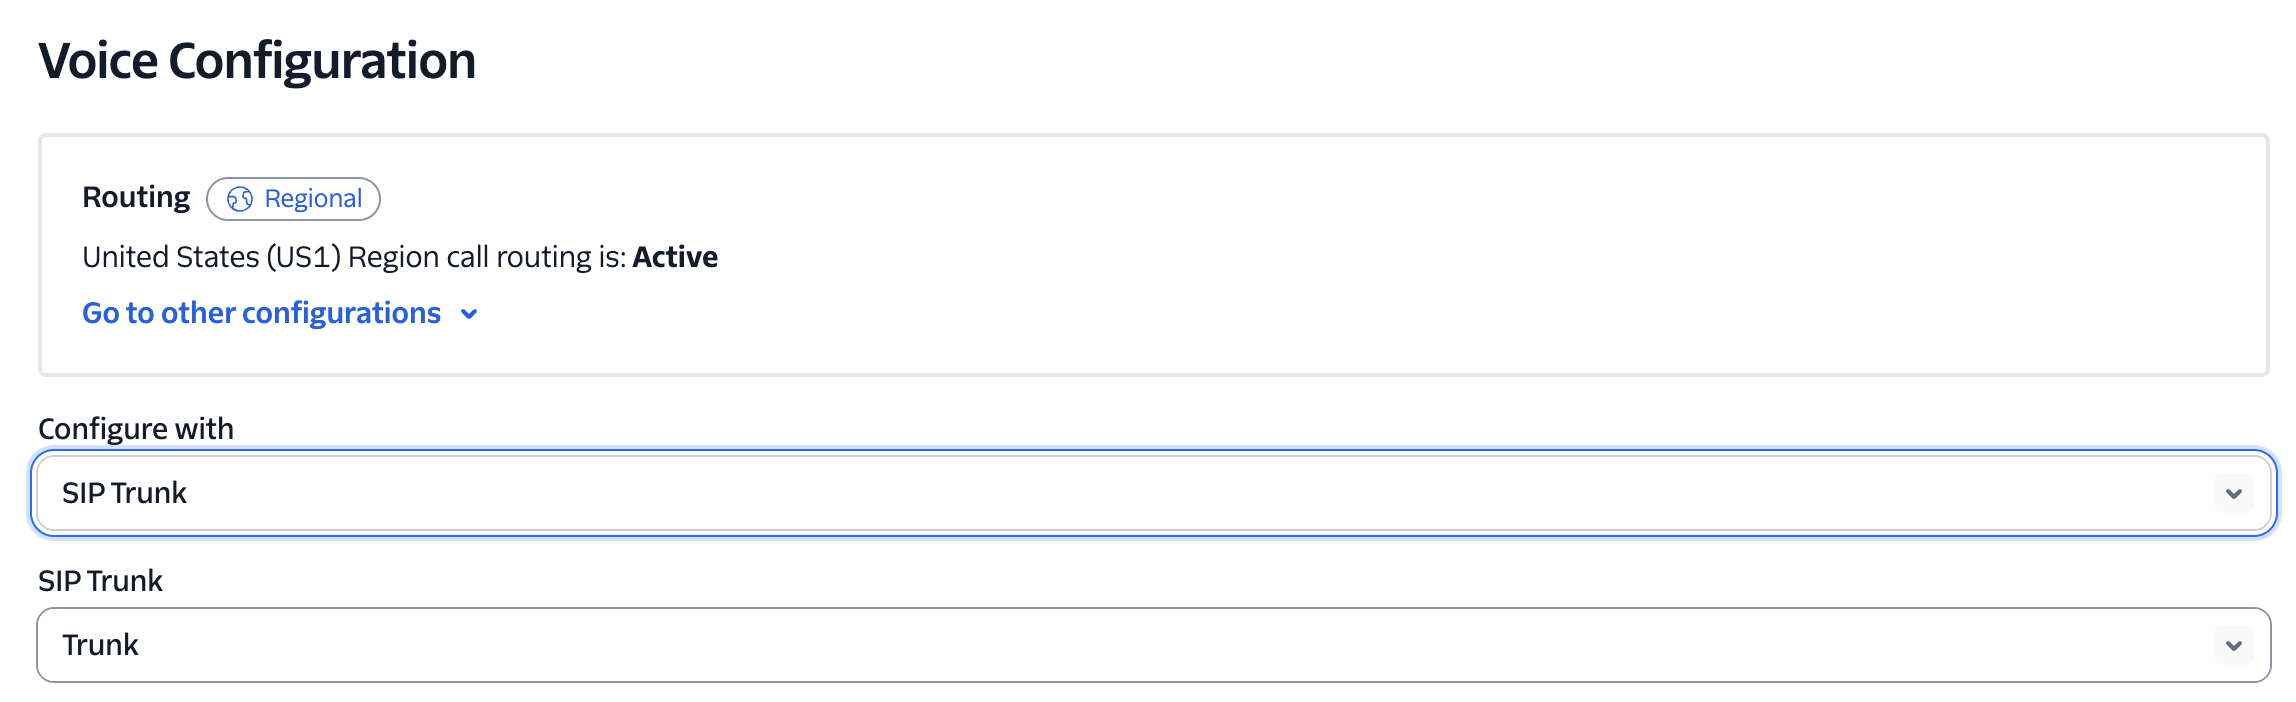
Click on your number in the Active numbers tab to open the configuration screen. Scroll to the Configure with section, click on the field below, choose SIP Trunk, and in the SIP Trunk field, select the name of your trunk.
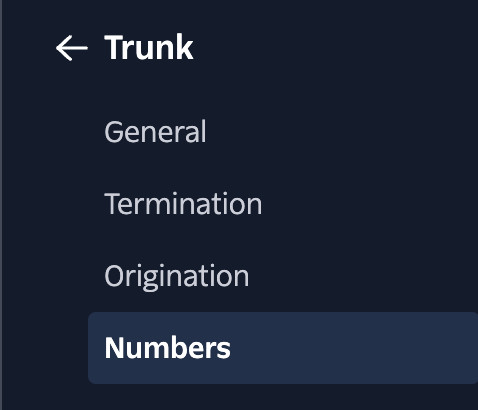
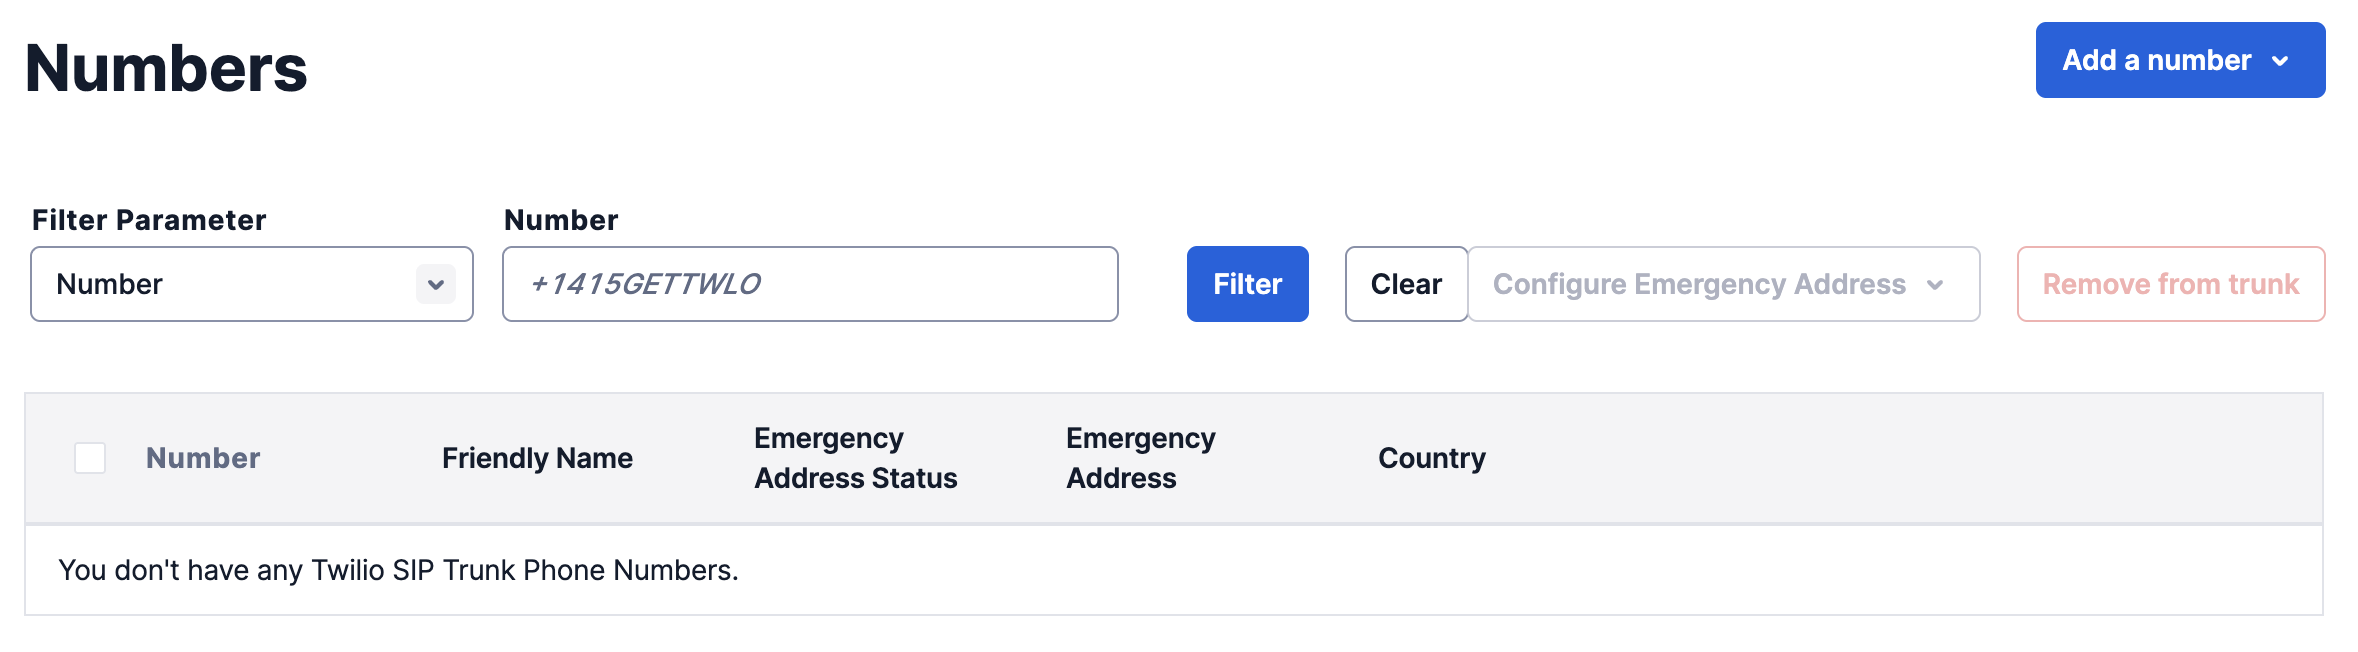
Go to the Elastic SIP Trunks tab again, click on your Trunk, and choose Numbers from the left menu. Add the existing number that you just configured.
Outbound configuration
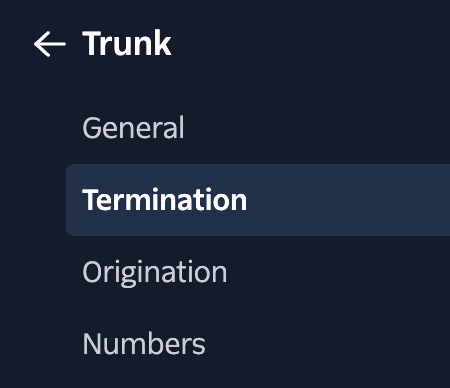
Go to the Elastic SIP Trunks tab and choose your trunk.
Click on the Termination tab from the left menu. Then create a new Termination SIP URL. Twilio will let you know if it’s available or not. If it’s available, then copy it, including the
.pstn.twilio.com, and save it somewhere for now.


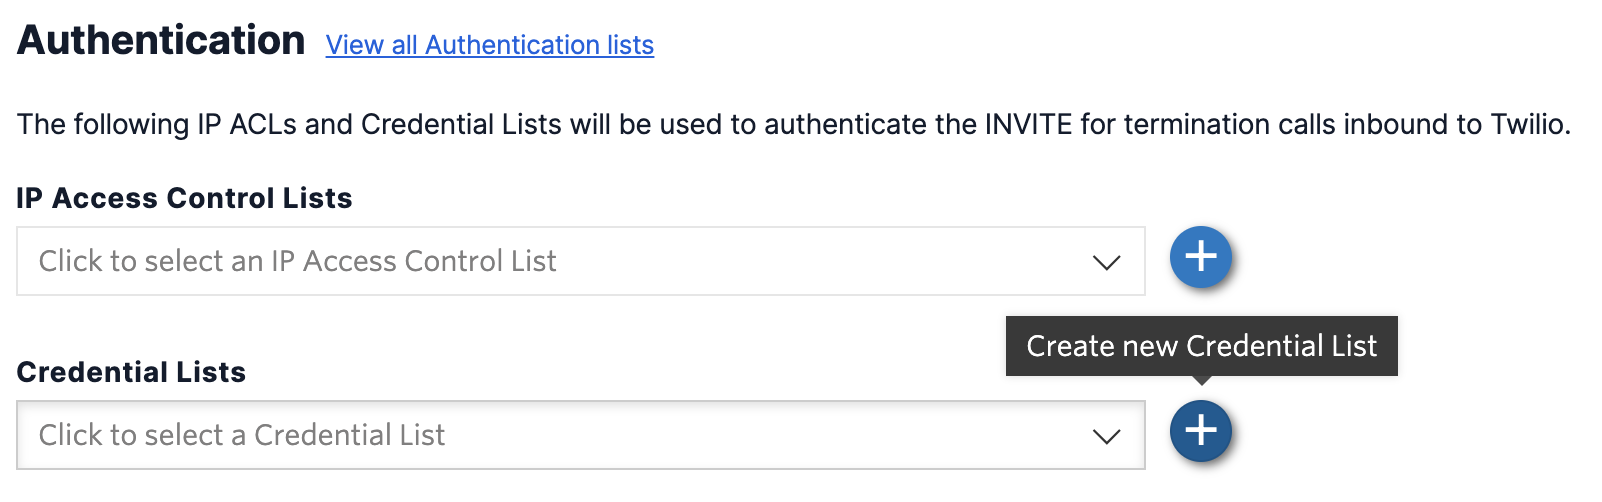
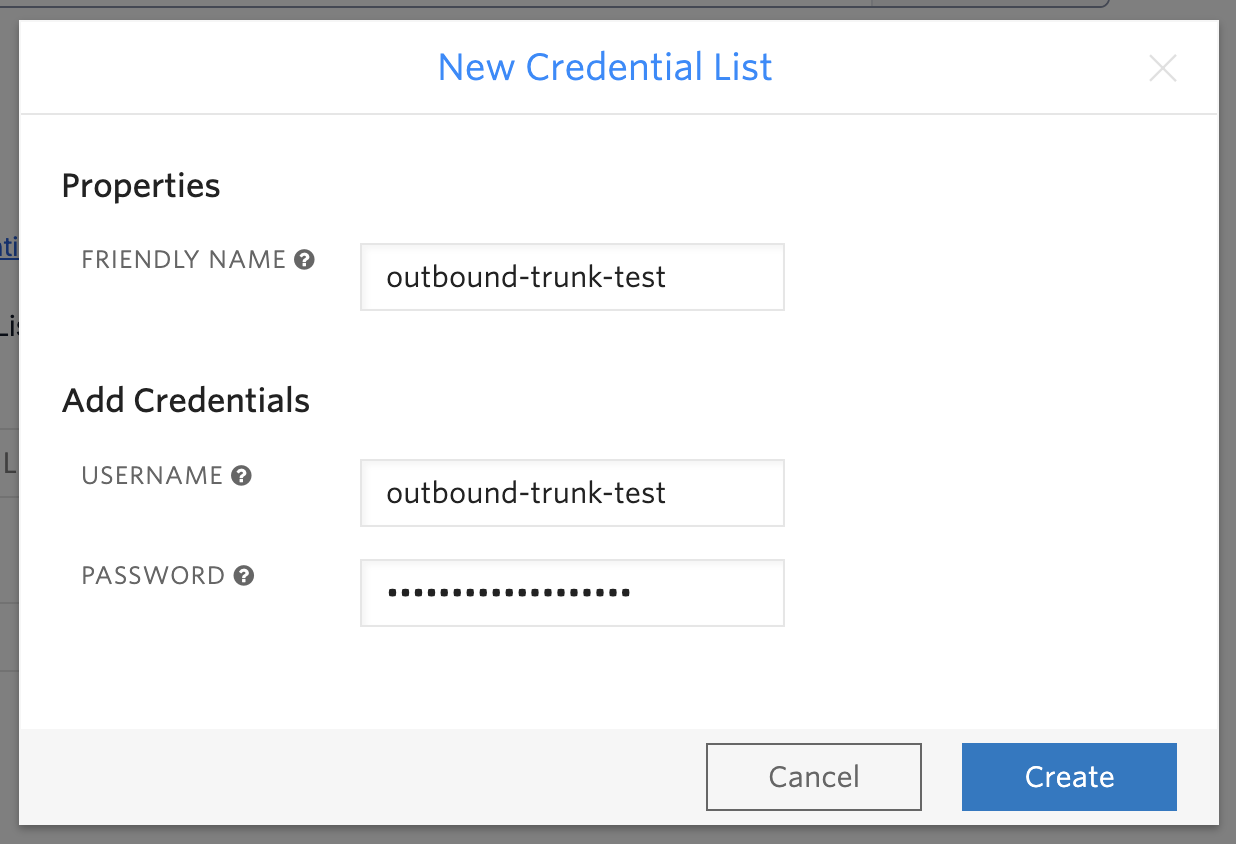
Scroll down to the Authentication section. Create or choose an existing Credential List. Save those credentials somewhere safe for now. Click Save at the bottom of the screen.
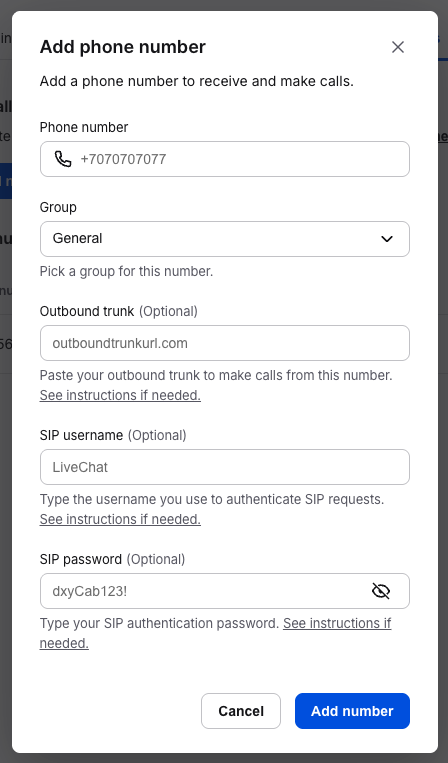
Log in to your LiveChat account, and go to the Apps tab, then to the LiveCalls. Go to the Settings and click on the Voice calls tab.
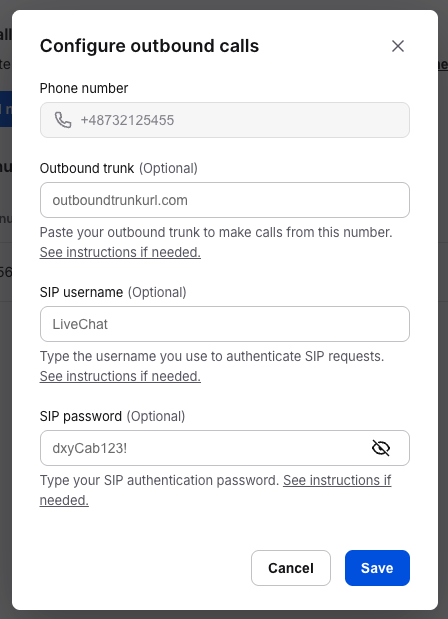
You can add a new number and configure the outbound calls during this process, or edit the existing number by clicking the pencil icon.
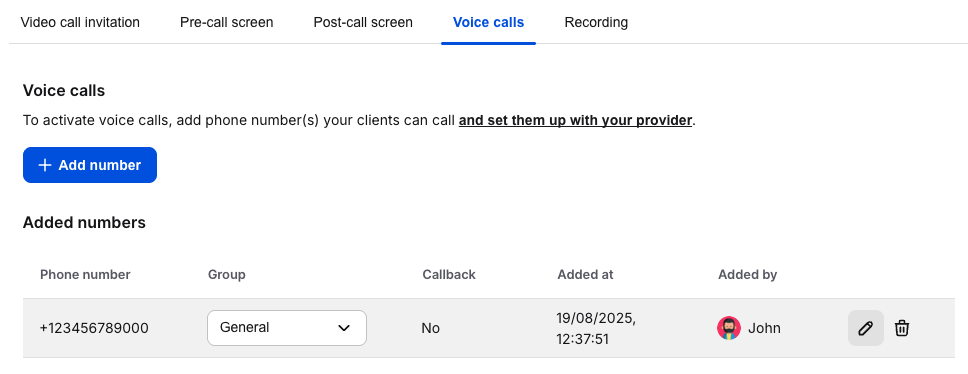
Here, you need to provide the URI in the Outbound trunk field from the 2nd step and the SIP username and SIP password from the 3rd step. Click Save.
We don't store the SIP username and SIP password in our database, so you will have to enter them again during subsequent edits.
Telnyx Softphone Configuration
Log in to your Telnyx account or create a new Telnyx account.
Use one of your existing numbers or buy a new one with voice capability in the My Numbers tab.
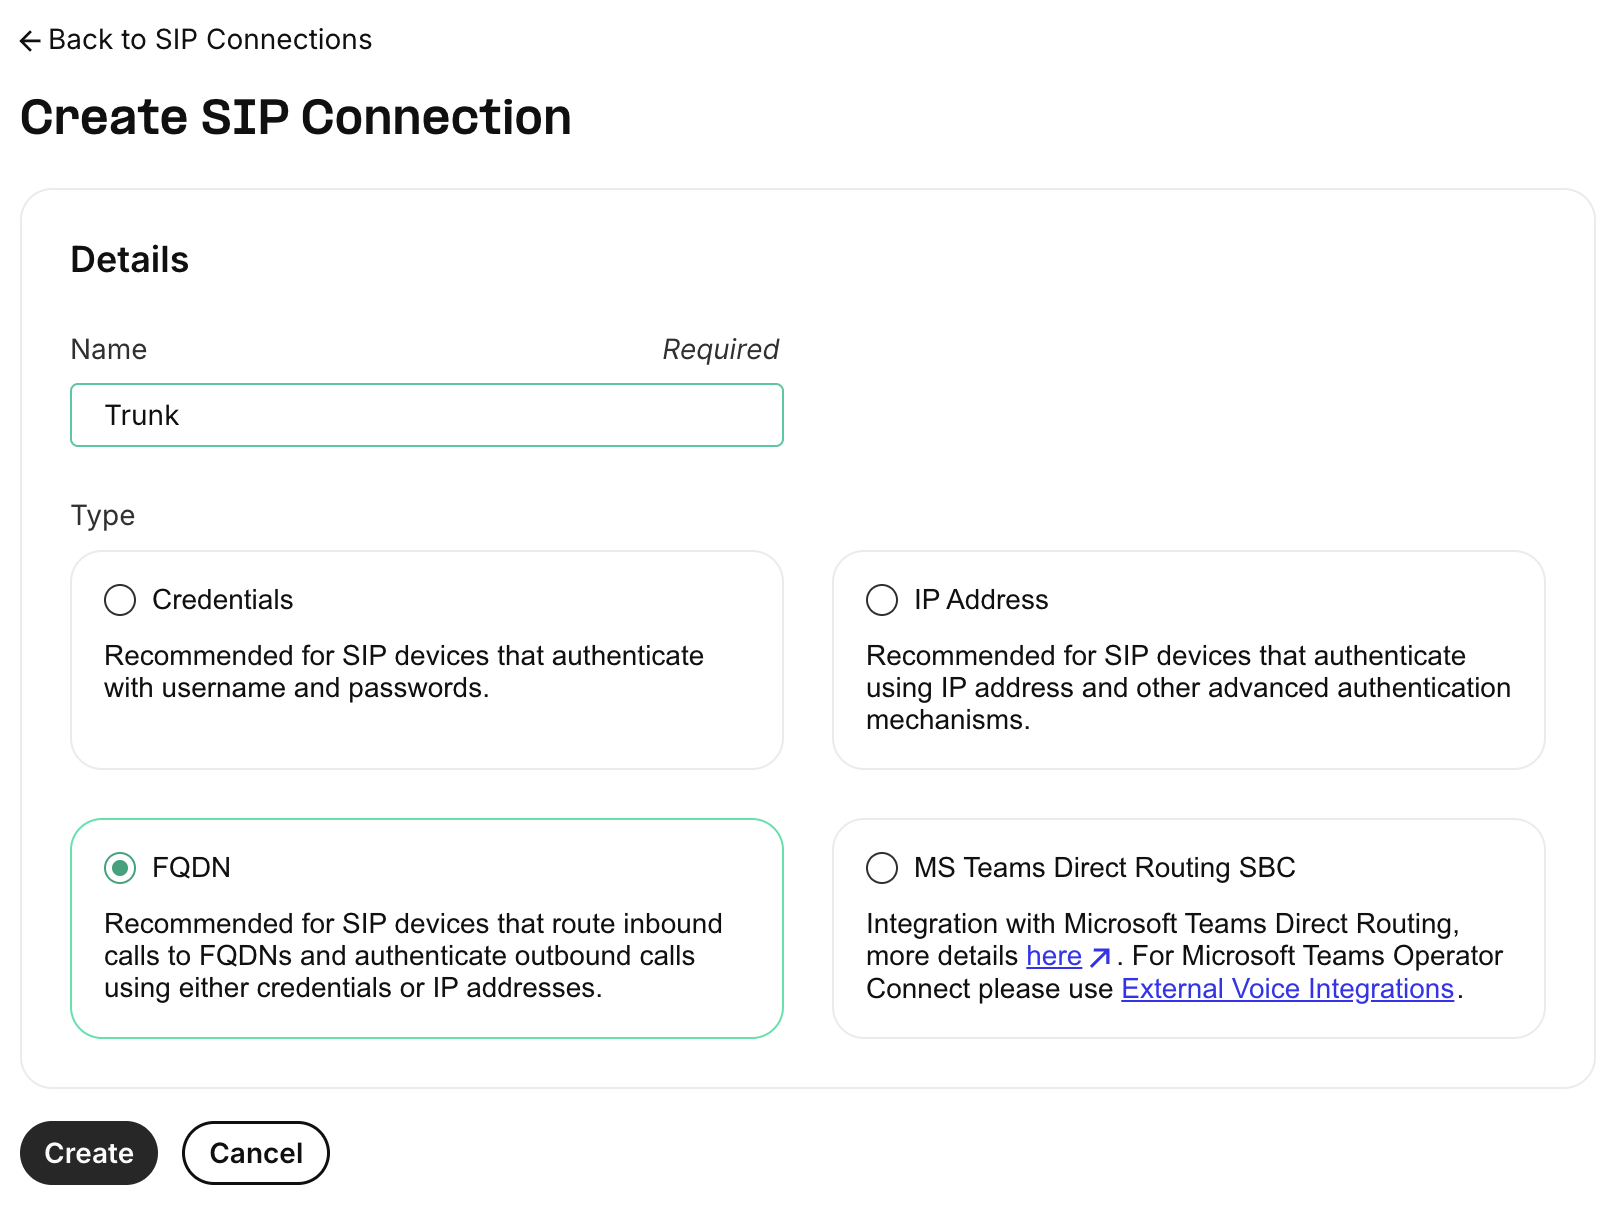
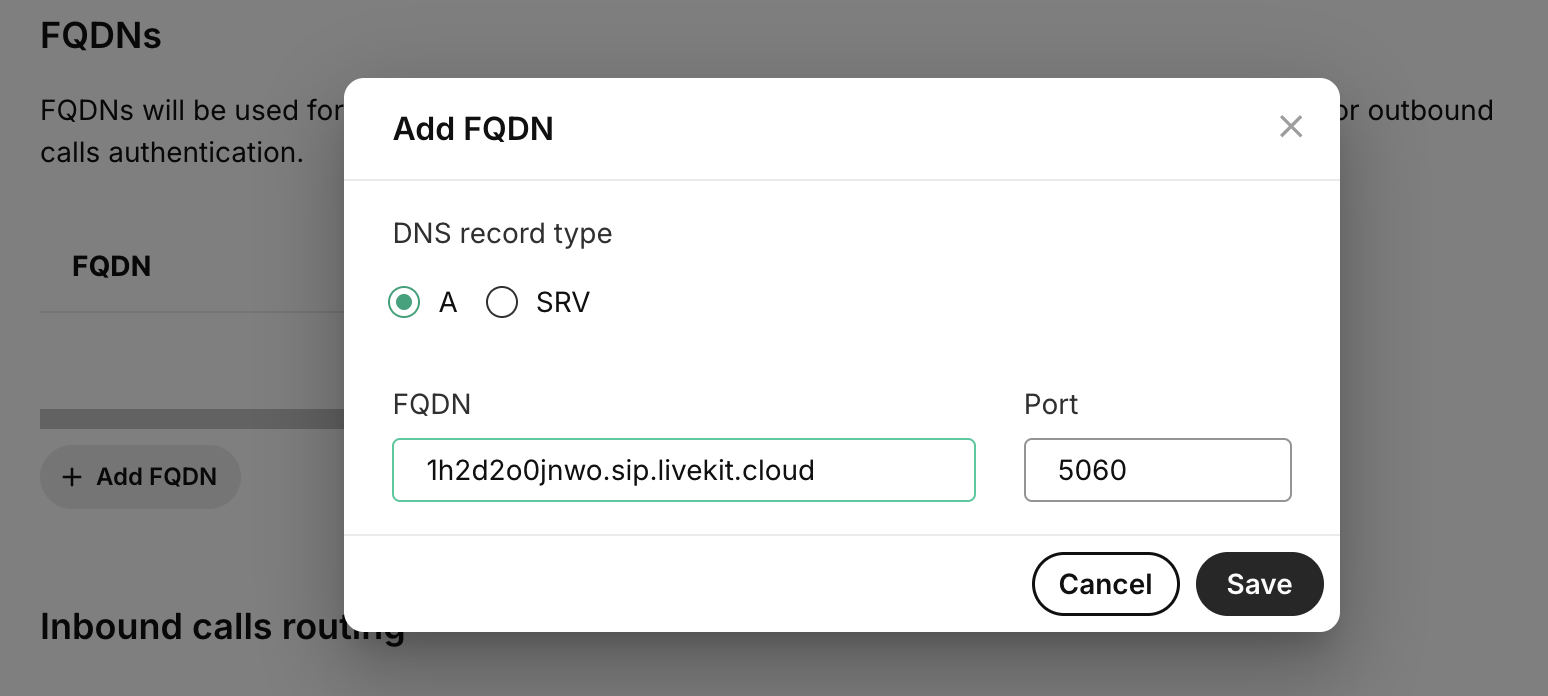
Create a new SIP connection in the SIP Trunking tab. Give it a name, select FQDN, and create.
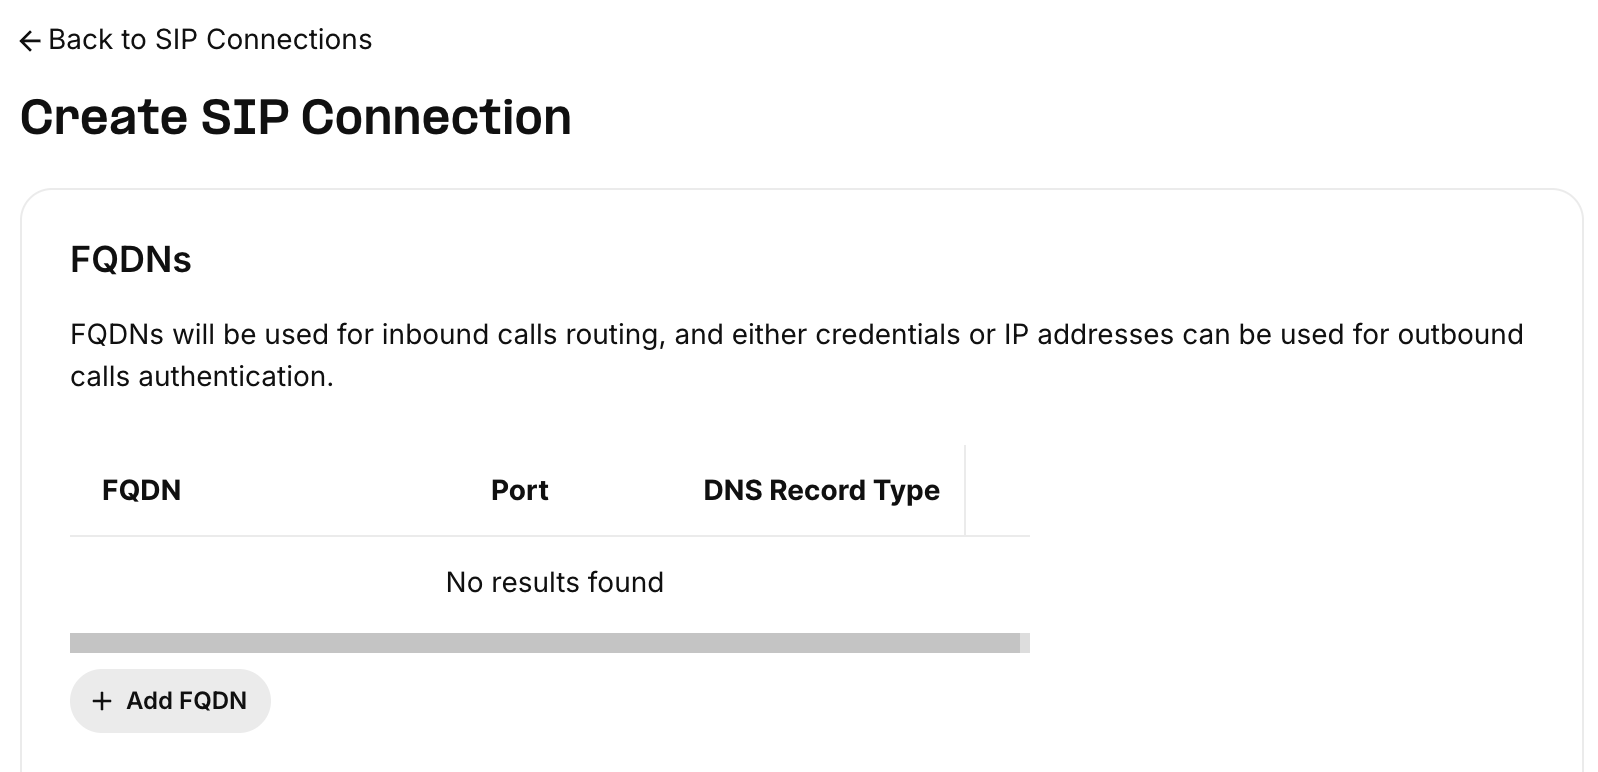
In the next step, click on Add FQDN, enter
1h2d2o0jnwo.sip.livekit.cloudinto the FQDN field and save it. Then scroll down and click the Next button.
Click the Next button in the Configuration step.
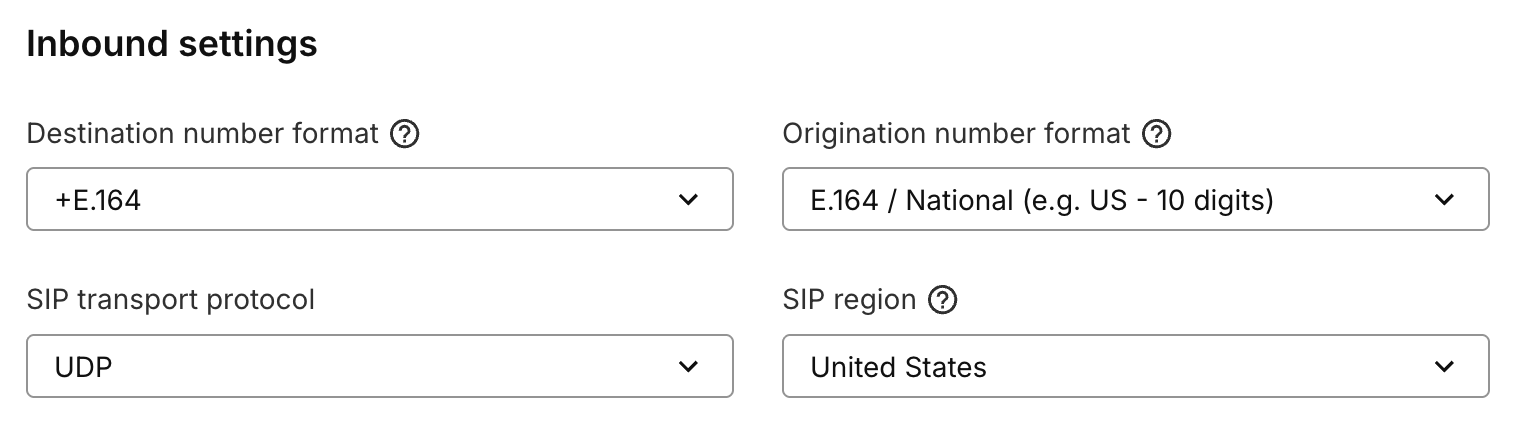
In the Inbound step, choose the
+E.164in the Destination Number Format field, theTCPorUDPin the SIP Transport Protocol field, and select your region in the SIP Region field. Scroll down and click the Next button.
Click the Next button in the Outbound step.
In the Numbers step, assign a phone number to the SIP trunk. Click Complete to finish.
Outbound configuration
Go to the SIP Trunking tab. Click on the edit icon for your trunk.

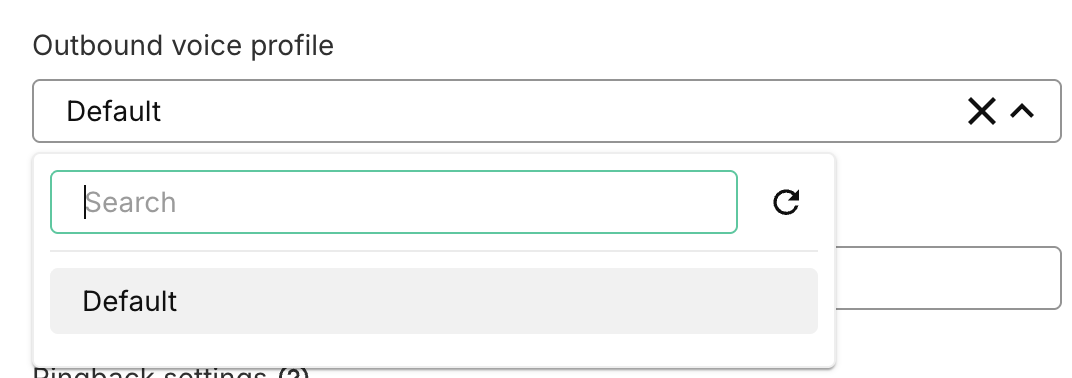
Select the Outbound tab. In the Outbound Voice Profile field, select or create an outbound voice profile.
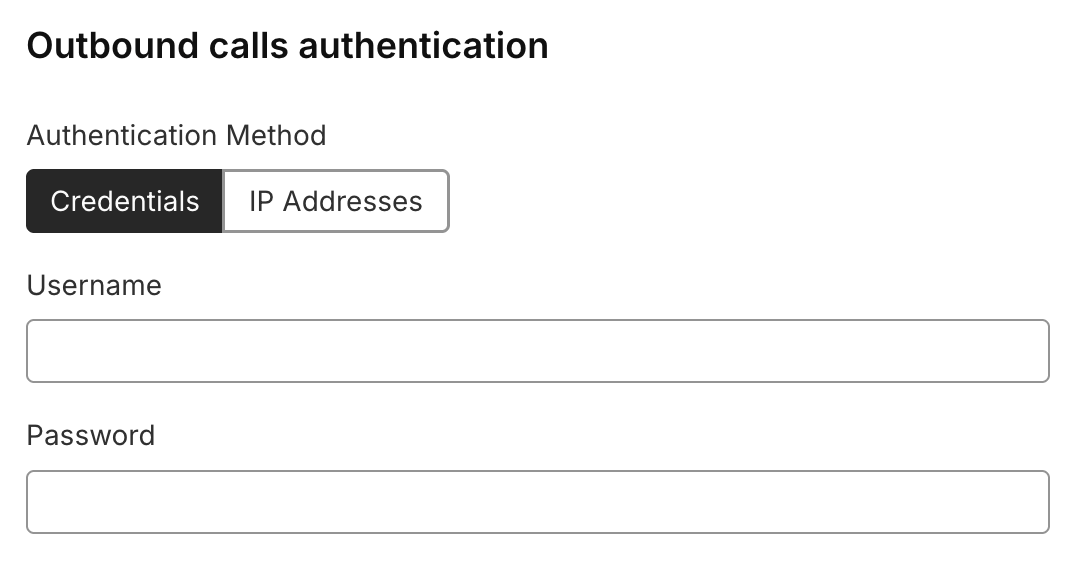
Now go to the Authentication and routing tab. Scroll down to the Outbound calls authentication, and in the Authentication Method, choose Credentials. Enter a username and password. Click Save to finish.