Outbound campaigns
With Outbound Messages, you can send marketing or informational campaigns to your customers directly on a specific channel. You can create campaigns for:
If the number of conversations available in your WhatsApp plan isn't enough to send a campaign, simply top up your Conversations Billing. You don't need to top up your Outbound messages balance.
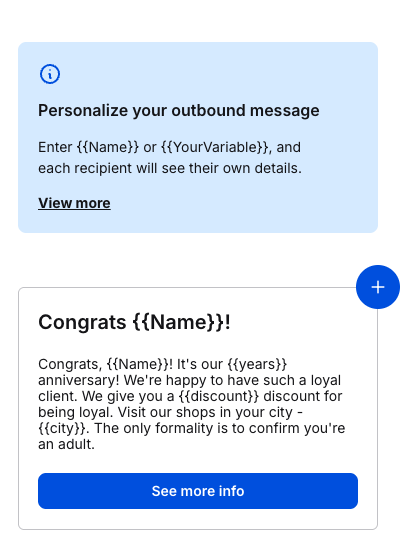
Personalization
Custom fields enable you to collect and display relevant customer information, such as age, interests, etc., to personalize interactions with them. These fields appear in customer details and beside every chat. You can use them in outbound campaigns to personalize each message sent.
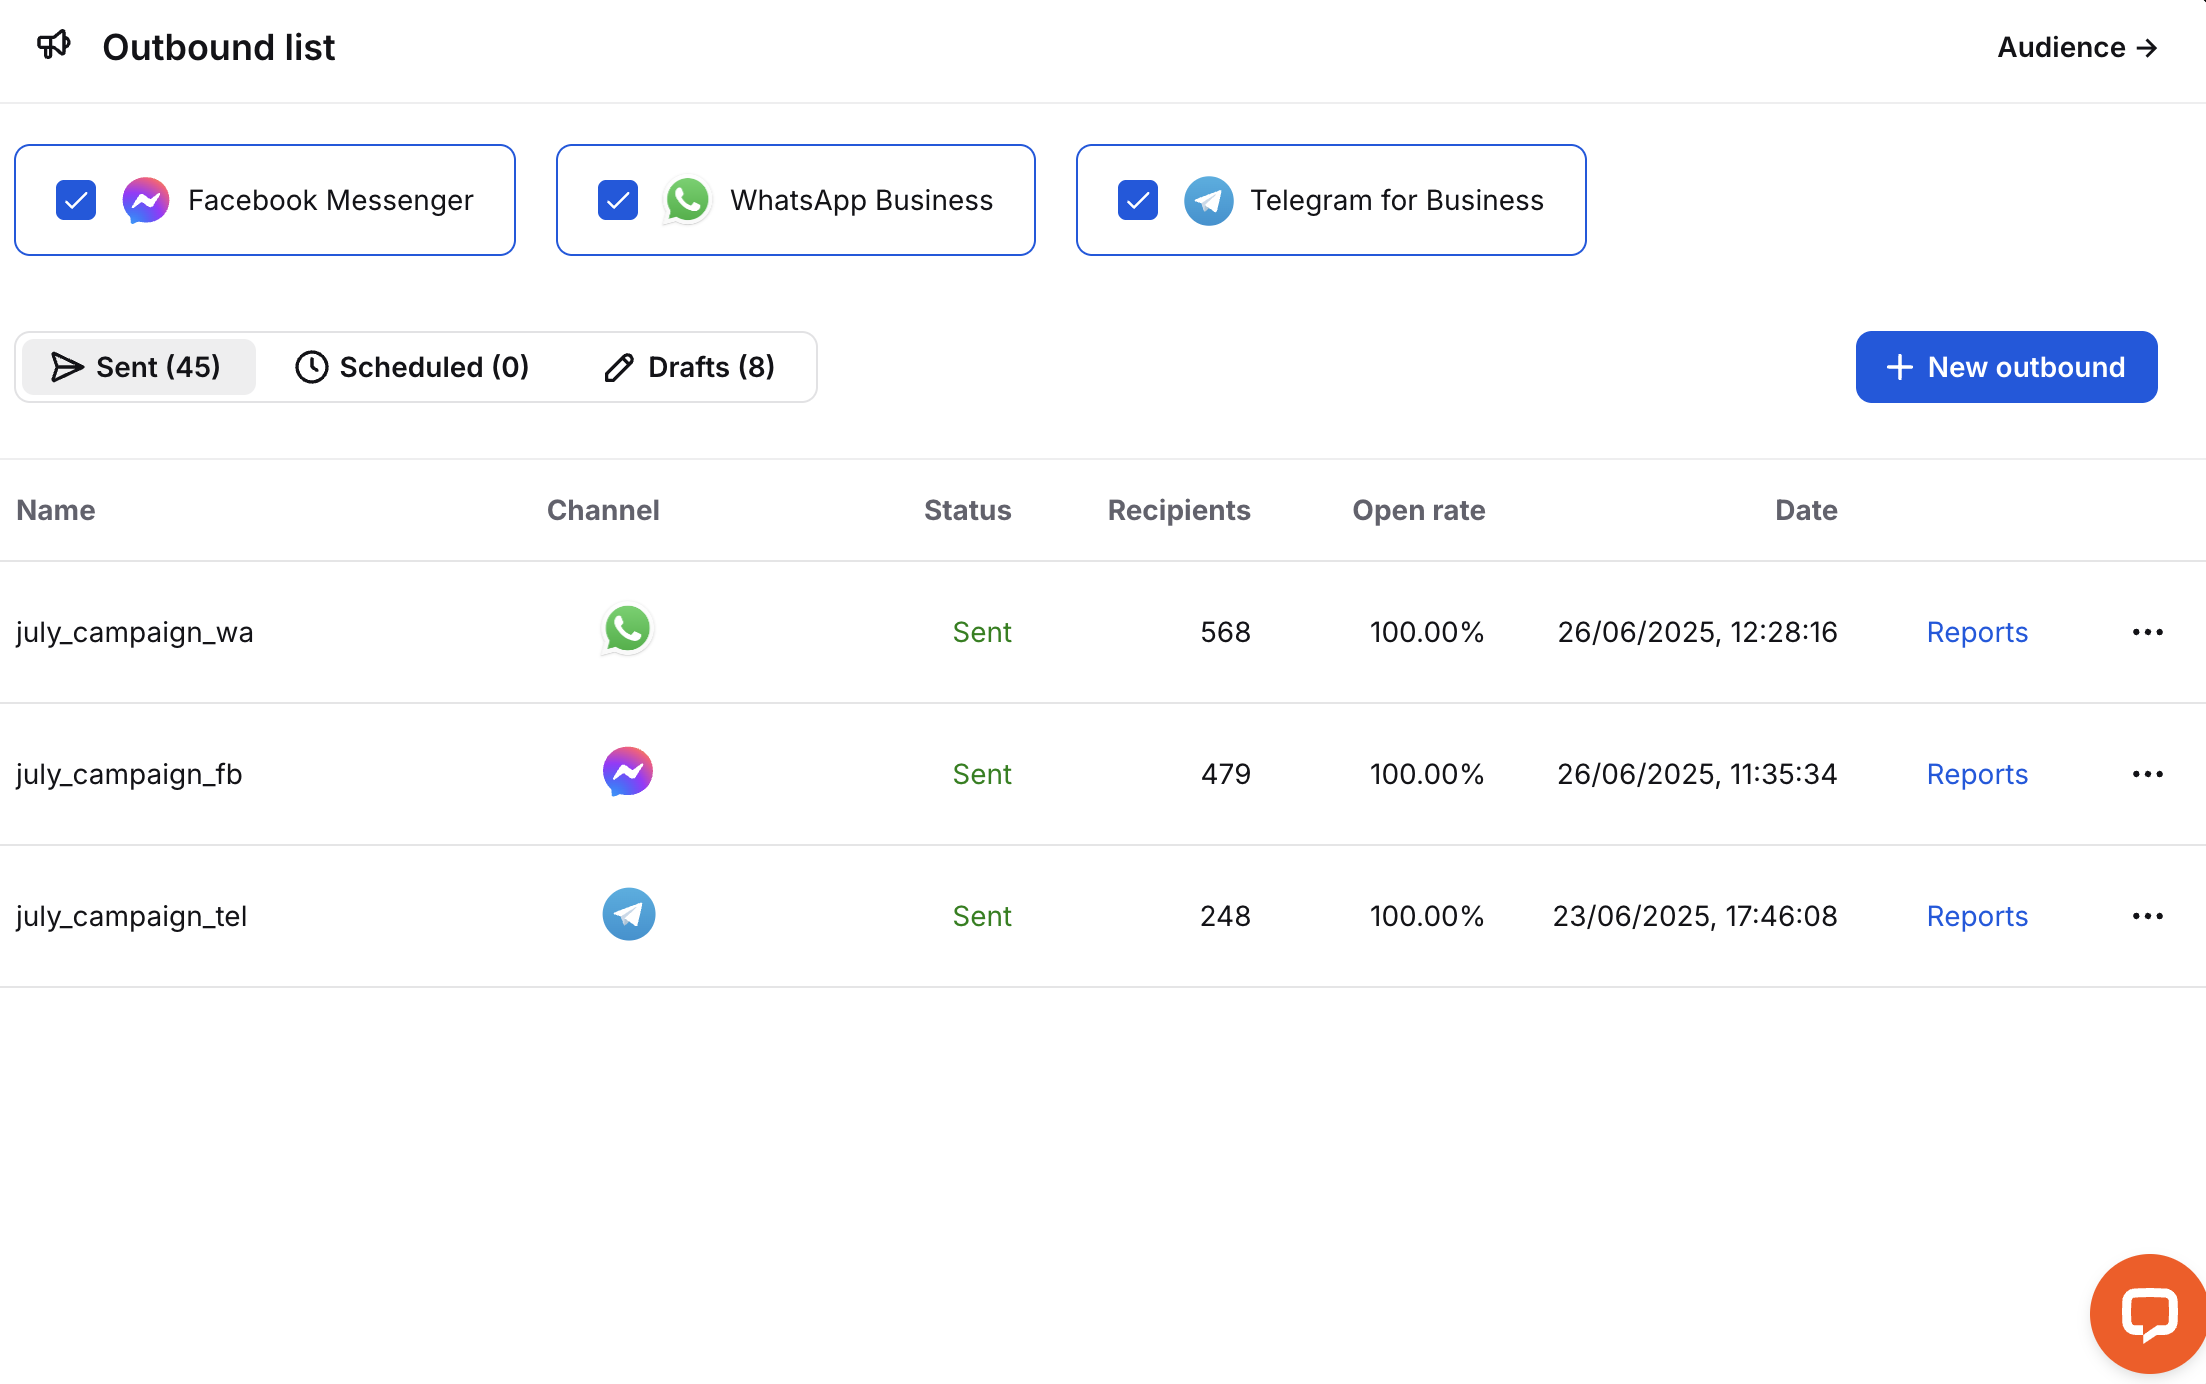
Outbound list
Go to the Engage section and select the Outbound messages tab.
Here, you’ll see the complete list of all your outbounds. You can mark what channels you want to see and change the view between Sent, Scheduled, and Drafts. The list will show you results based on the filters you choose. From here, you can view reports about the sent ones, edit drafts, or delete any of them. You can find the last two options in the three-dotted menu. To create a new campaign, click + New outbound.
Reports
After clicking on the Reports link next to a sent outbound, you’ll see all the details about the sent outbound, the campaign name, where it was sent, by whom, by what channel, and from what number. You’ll see a preview of the message you sent on the right side.
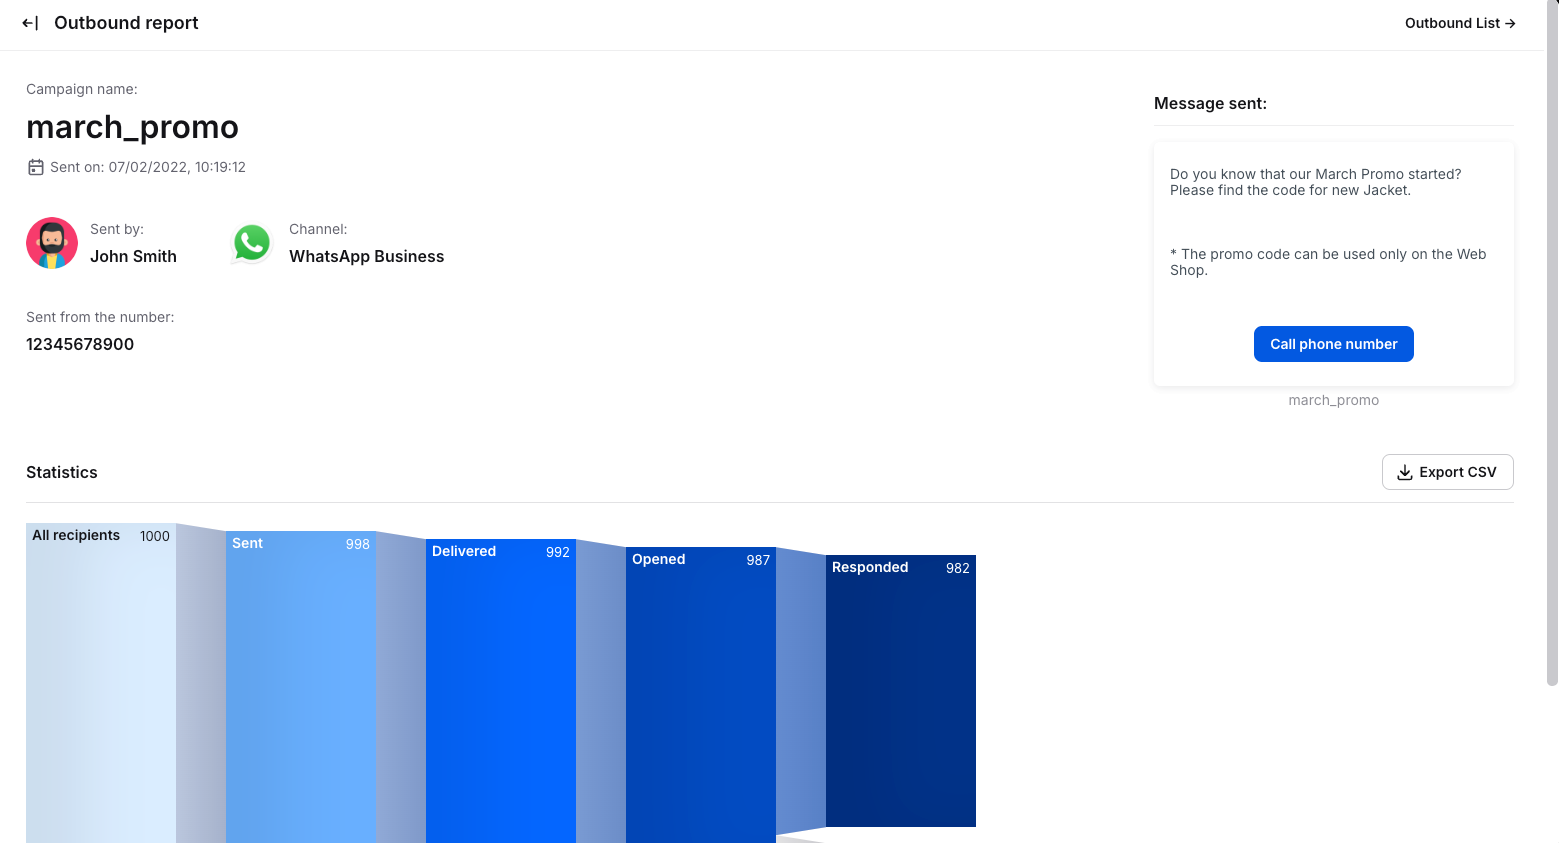
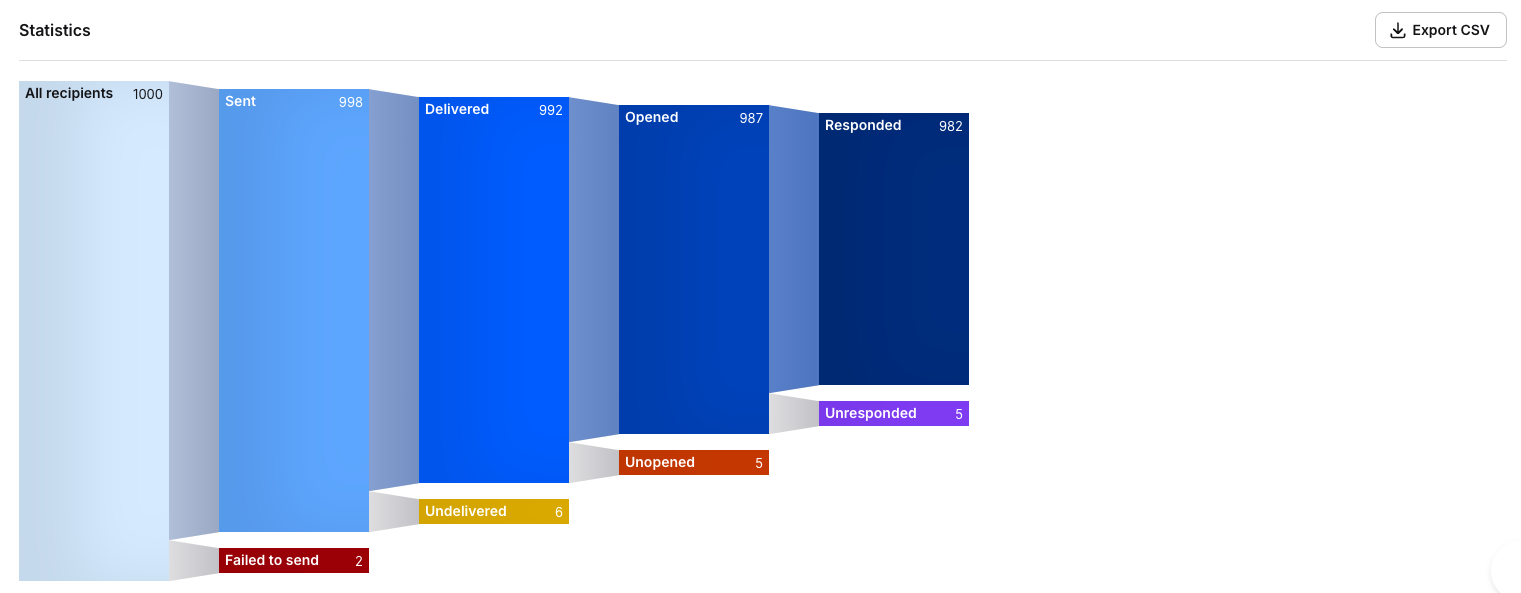
At the bottom of the report page, you will see statistics that you can also download by clicking Export CSV.
Here are the categories of the sent messages that you can see:
all recipients - number of people that meet the criteria for receiving this outbound:
sent - messages that were successfully sent:
delivered - number of people that received your message:
opened - messages that your customers opened:
responded - number of people that sent an answer for this outbound in 7 days,
unresponded - number of people that haven’t sent an answer for this outbound yet,
unopened - messages that your customers haven’t opened yet,
undelivered - messages that were sent successfully but not yet delivered,
failed to send - messages that were not sent due to an error.